My first job out of school was with Schlumberger (actually it was my second, but that is another story), where I worked as a field engineer and eventually as a manager, spending my first 5 years in southern Louisiana and the next almost 5 years in Indonesia. This old recruiting video surfaced on the Brother’s Reunited website, but also might be of interest to people who can’t get logged in to that site. It features a few of my colleagues from Badak (East Kalimantan):
Audi B7 S4 Valve Cover Gasket Replacement – Part 2
Tackled the passenger side valve cover today, here are the few things I would add to Joey’s excellent DIY.
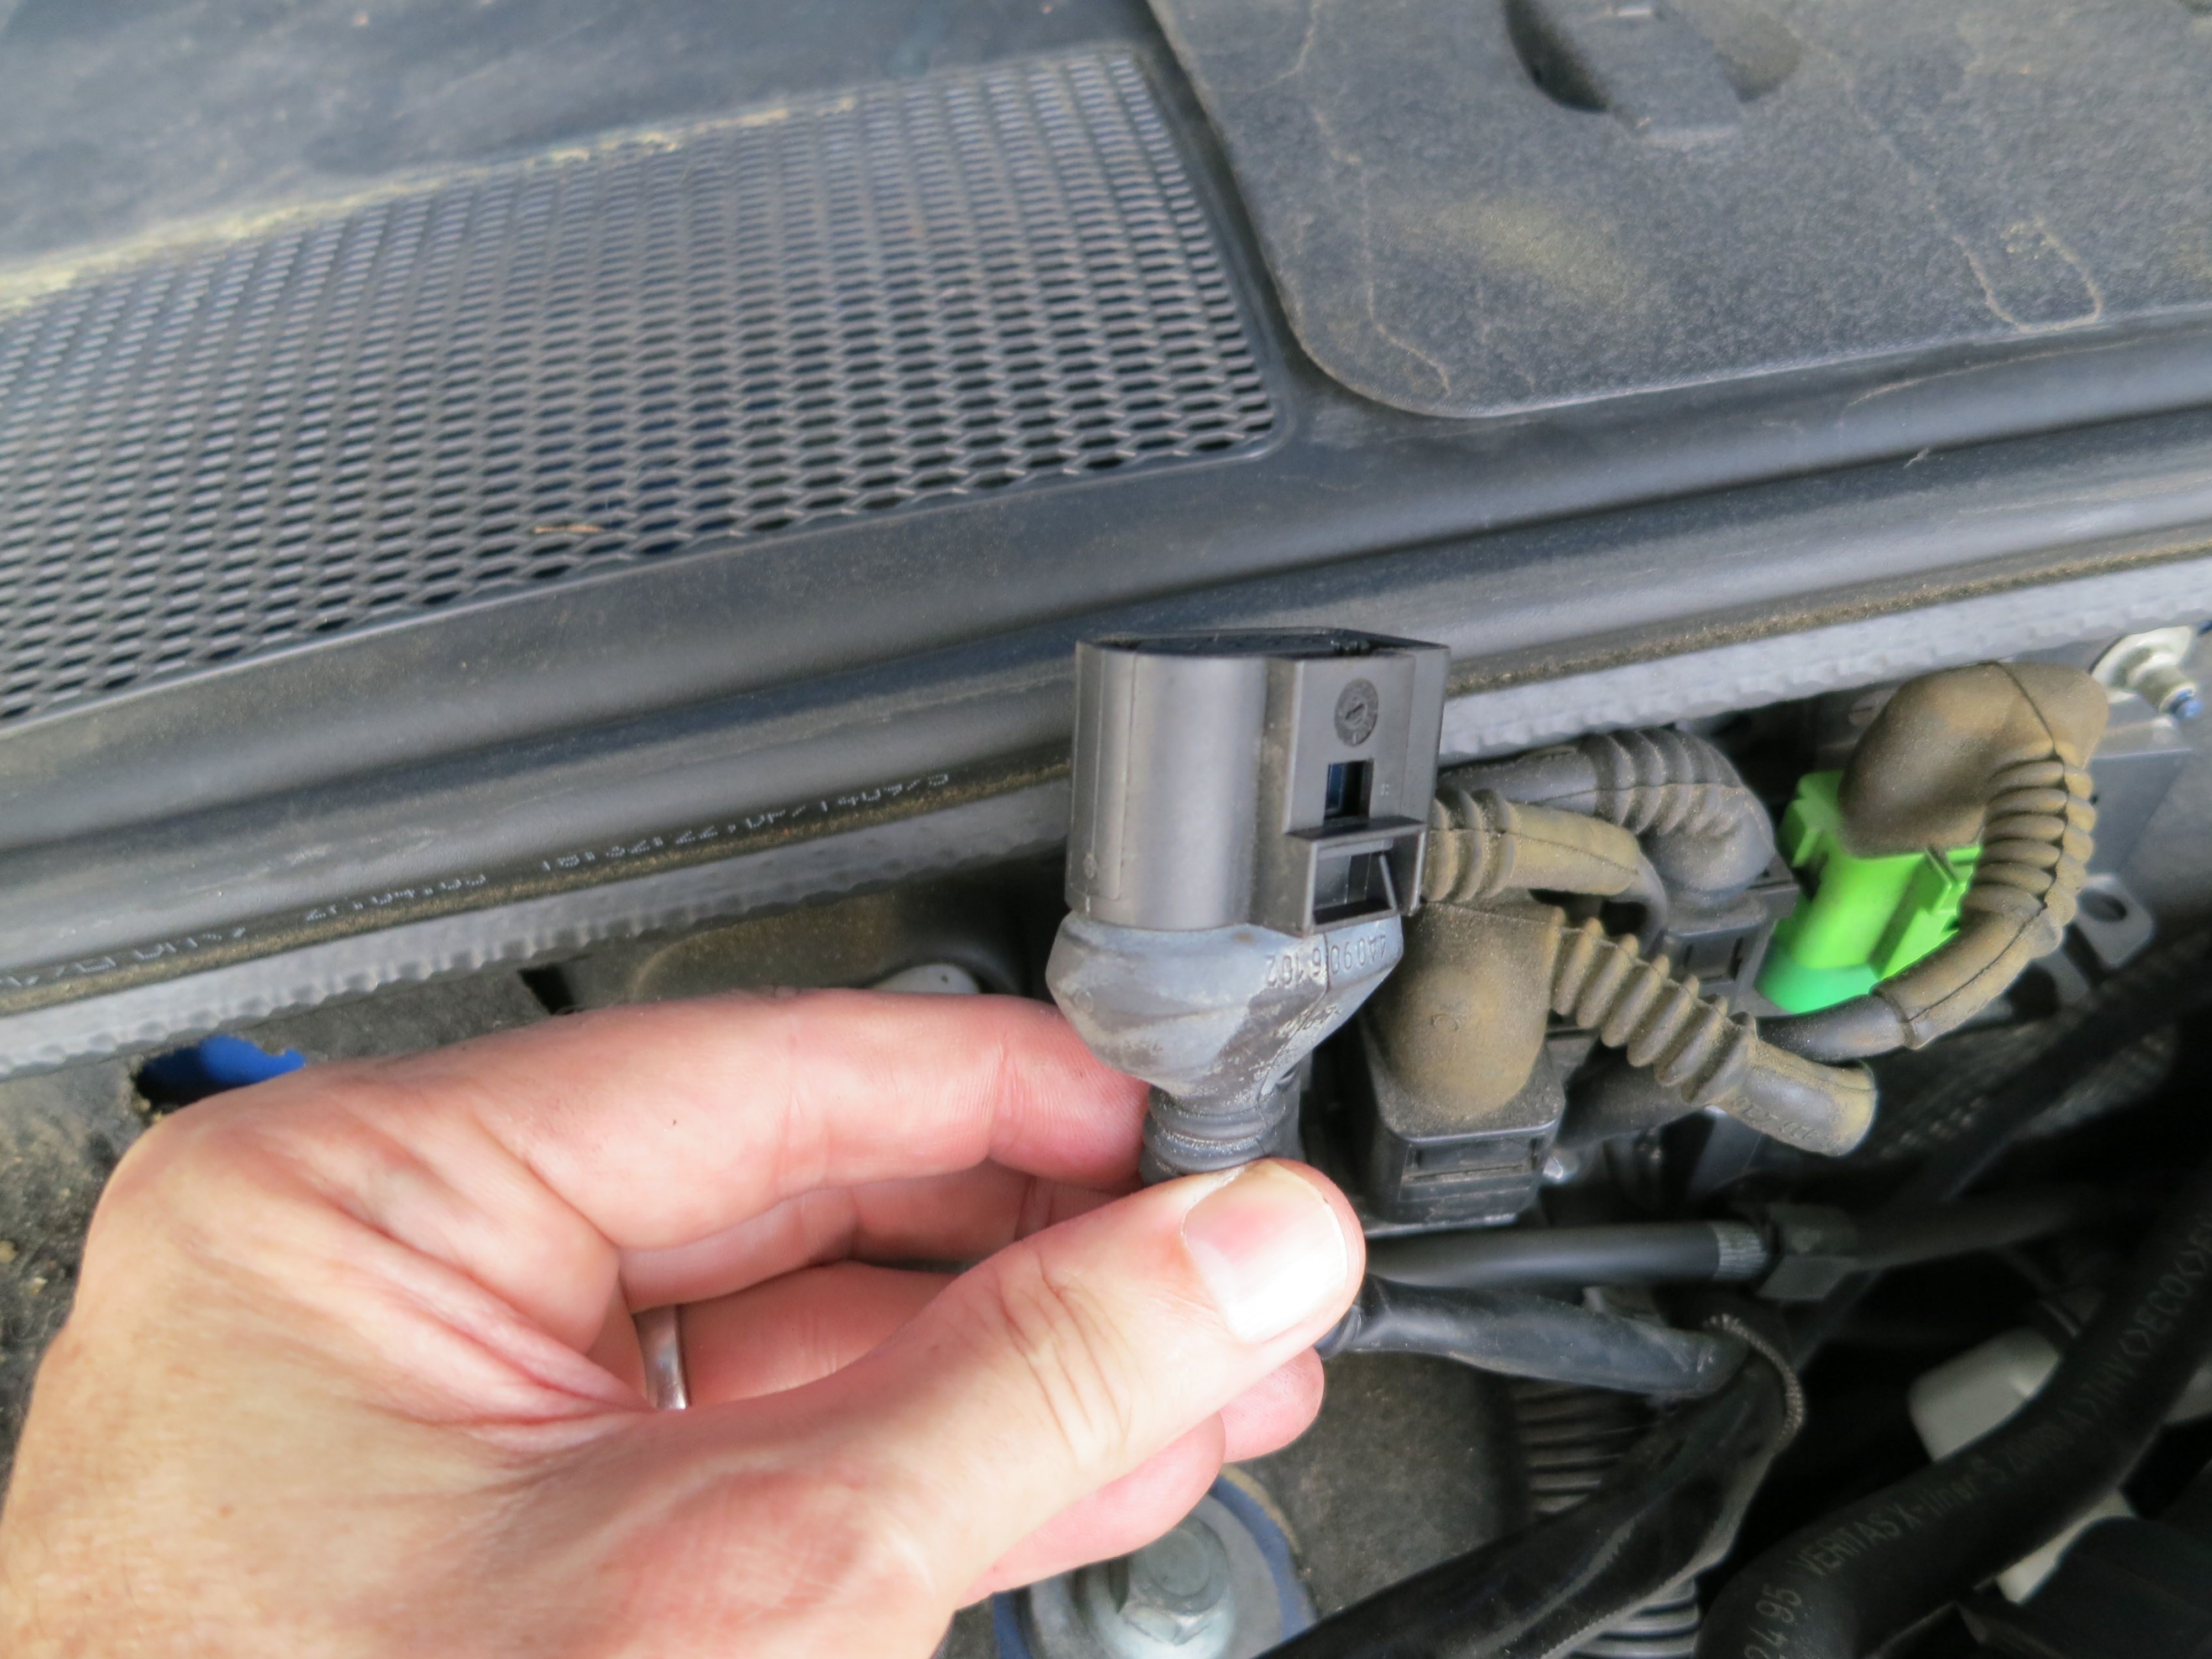
erWin manual says to disconnect the fuel hose from the fuel rail pipe. Probably would have made it a little easier to get the cover off and then back on again, but I skipped this step. The connector at the MAF airflow sensor has the clip on the bottom so you can’t see what is going on. If you push in and back on the lever towards the back of the plug and give it a tug it will pop off. Here is a picture of the bottom of the plug:
Once I removed the air filter housing I could see that it looked like there was in fact some oil leaking:
When I got the coil packs out there was a little oil on the end of one of them, but one of them had an oil film from tip to tail:
I don’t think I am getting any misfires, so I cleaned it up and put it back in. Maybe the seal was leaking a little bit. When I pulled the old gasket off the valve cover it did feel a bit brittle at the edges. Almost seven years old, so understandable (I have owned the car since new). Also in the pic above you can see the coil pack puller I bought on eBay. It worked just fine.
Initially I did not remove the air guide attached to the throttle valve, but it was a bit of a pain when I took the cover off, and I wanted to be able to get at the sealing surface easily, so I took it off:

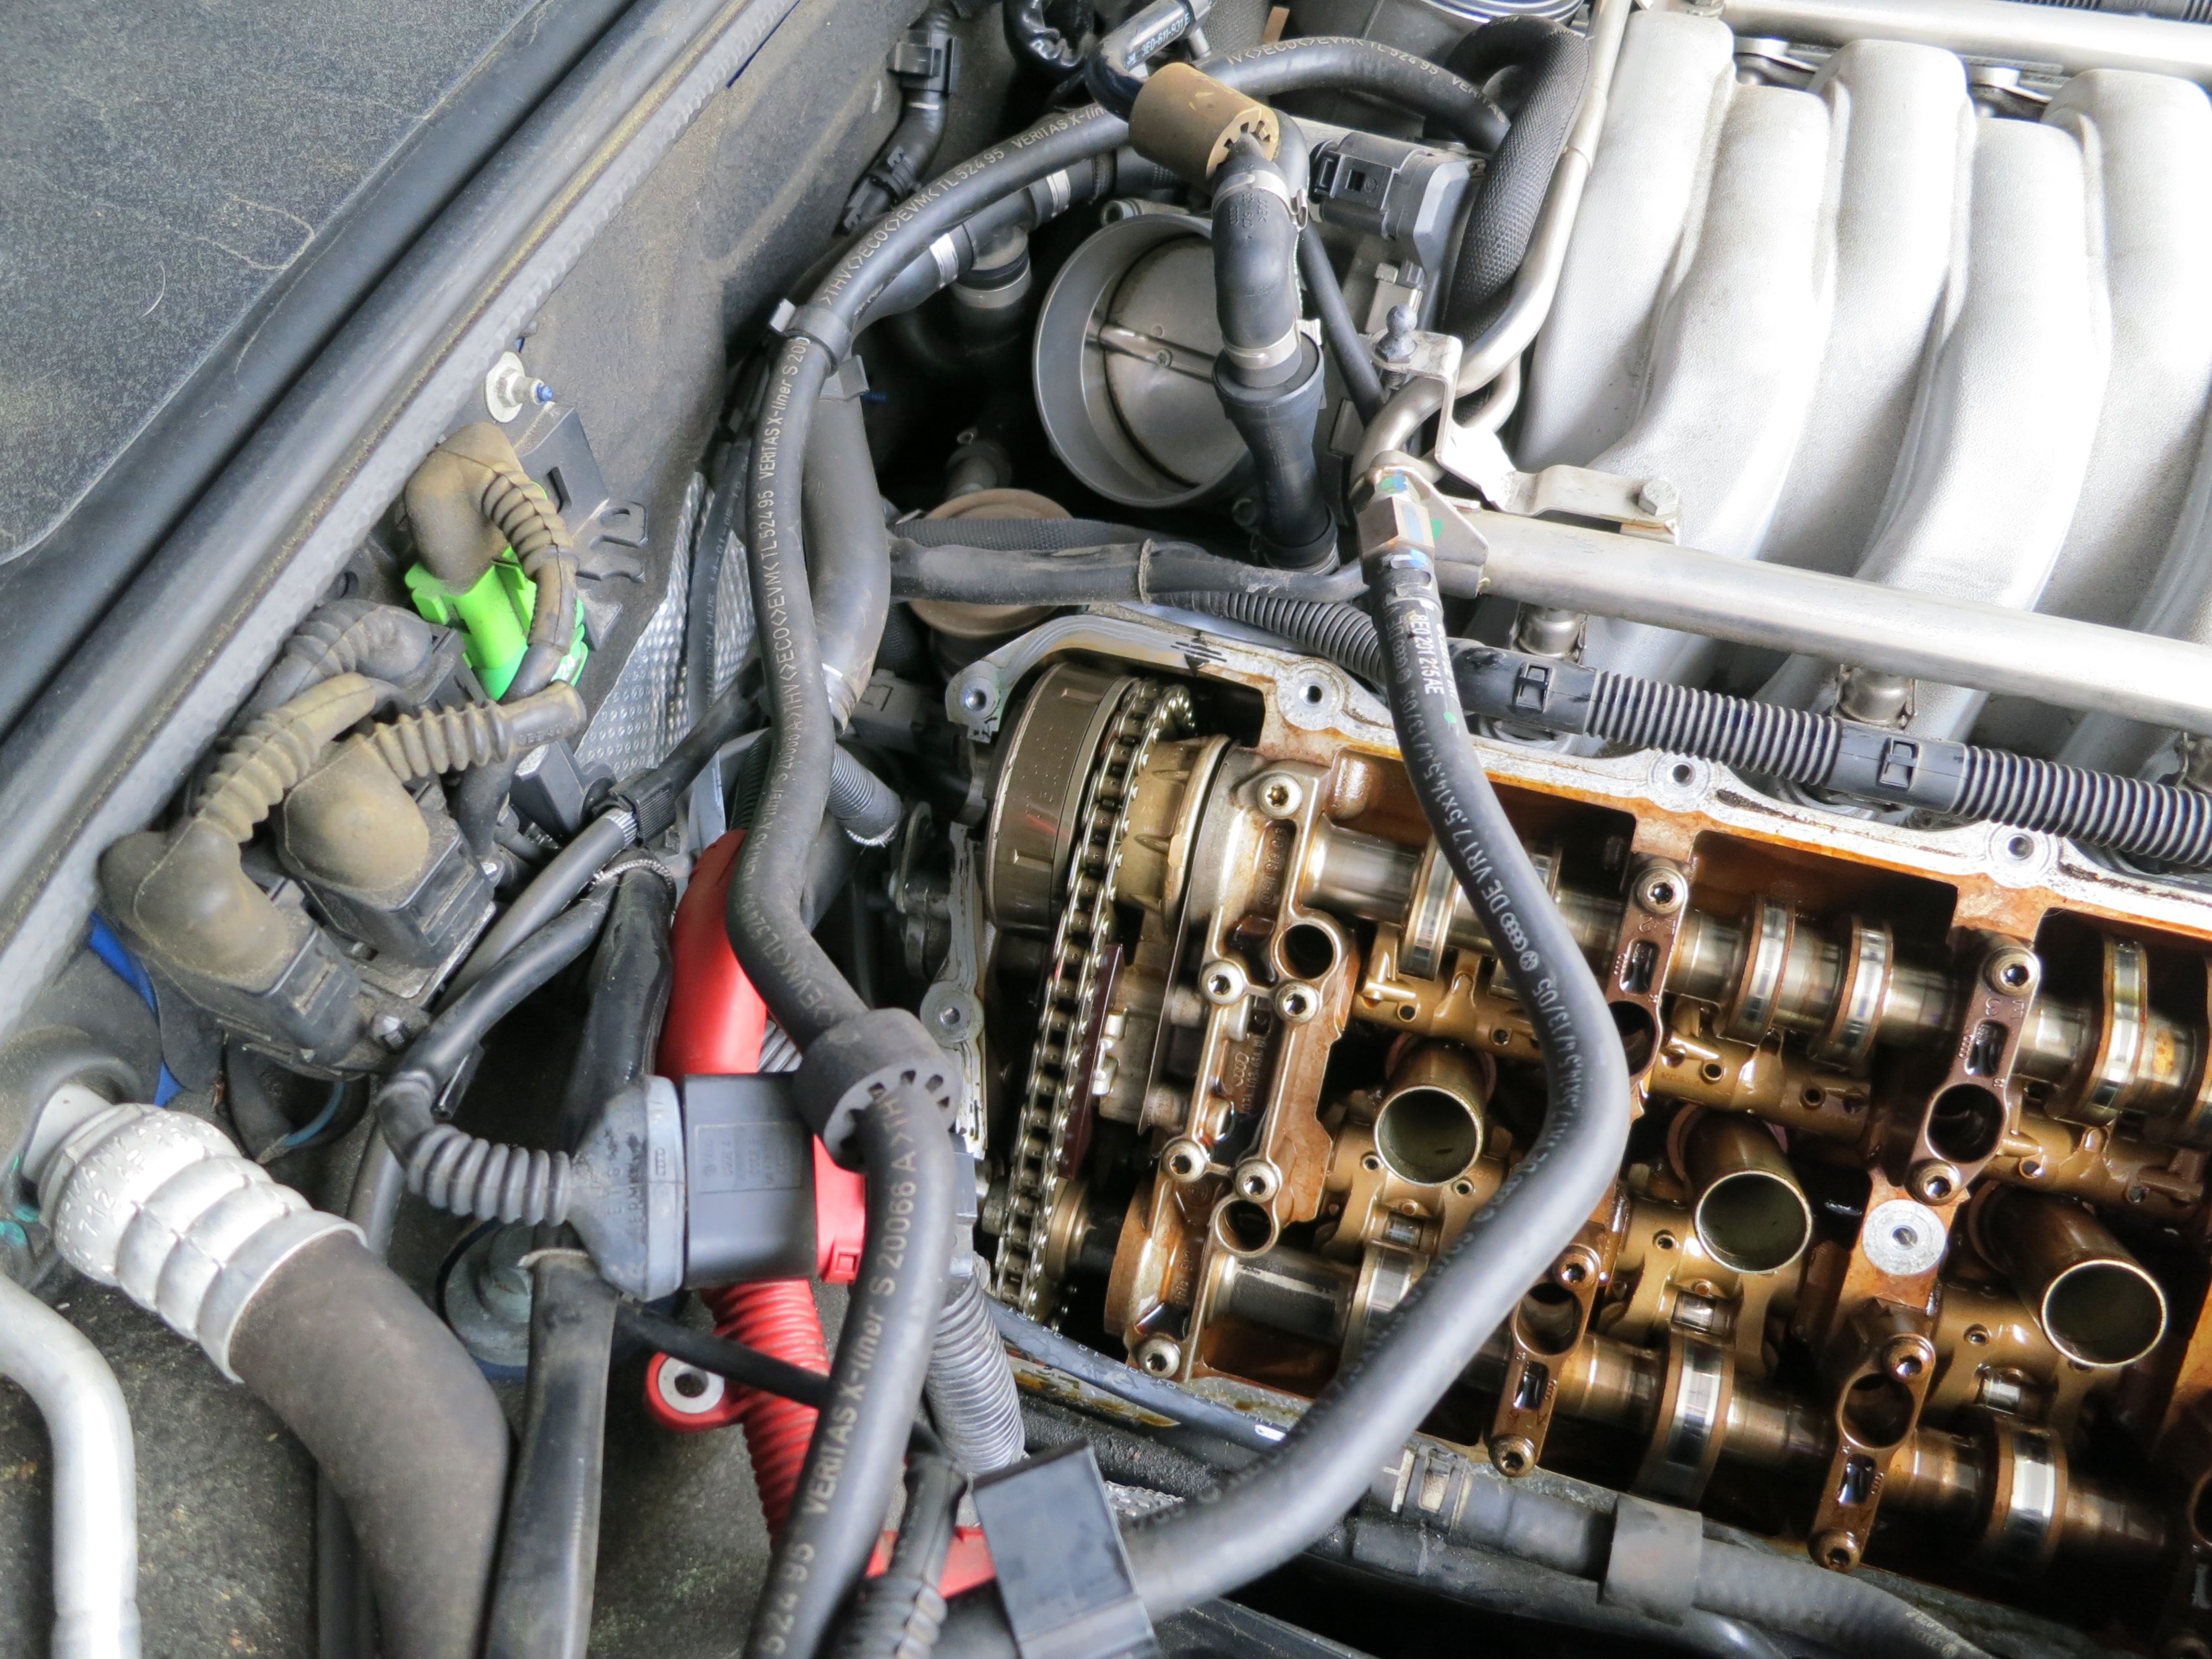
The factory clearly used high temp sealant, and were a little sloppy with same:
As for the driver’s side, I opted to not use sealant with the new gaskets. Again, seems to me the gaskets are held in place very nicely by the deep groove in the valve covers, as well as the bolt washers.
I didn’t think this side was any harder than the other side. Lower back bolt is hard to get at, but you can get one of the little ratchets that Joey suggests on it. And on this side you can even get a long T30 bit on the lower back bolt at an angle, but well enough to spin it out once it is loose.
I hope I didn’t over-torque the bolts. Unfortunately given bolt locations it is just not possible to get a torque wrench on a good number of them. I followed the erWin tightening pattern, snugging slowly, and went until it hurt my hand to go much tighter with a short 1/4 ratchet drive. Though I wonder if there is a downside to over tightening other than breaking the bolts, because there are a couple of washers and a rubber grommet, which if designed properly maybe bottom out and create the right pressure on the gasket via the compression of the grommets.
Audi B7 S4 Valve Cover Gasket Replacement – Part 1
Last time I had my S4 in for service (75k, so including ribbed belt replacement) the dealer pointed out that I had some oil leaking from the valve covers. The service advisor (working on a commission basis) said they recommended that I replace the valve covers along with the gaskets, at $660 per for the composite valve covers. He said no way to check existing covers for warpage (I assumed because they were a funny shape) and said they had better outcomes by replacing covers when they did gaskets. In absence of a AOA recommendation to do this I took a pass, did a little homework, and decided to replace the gaskets myself.
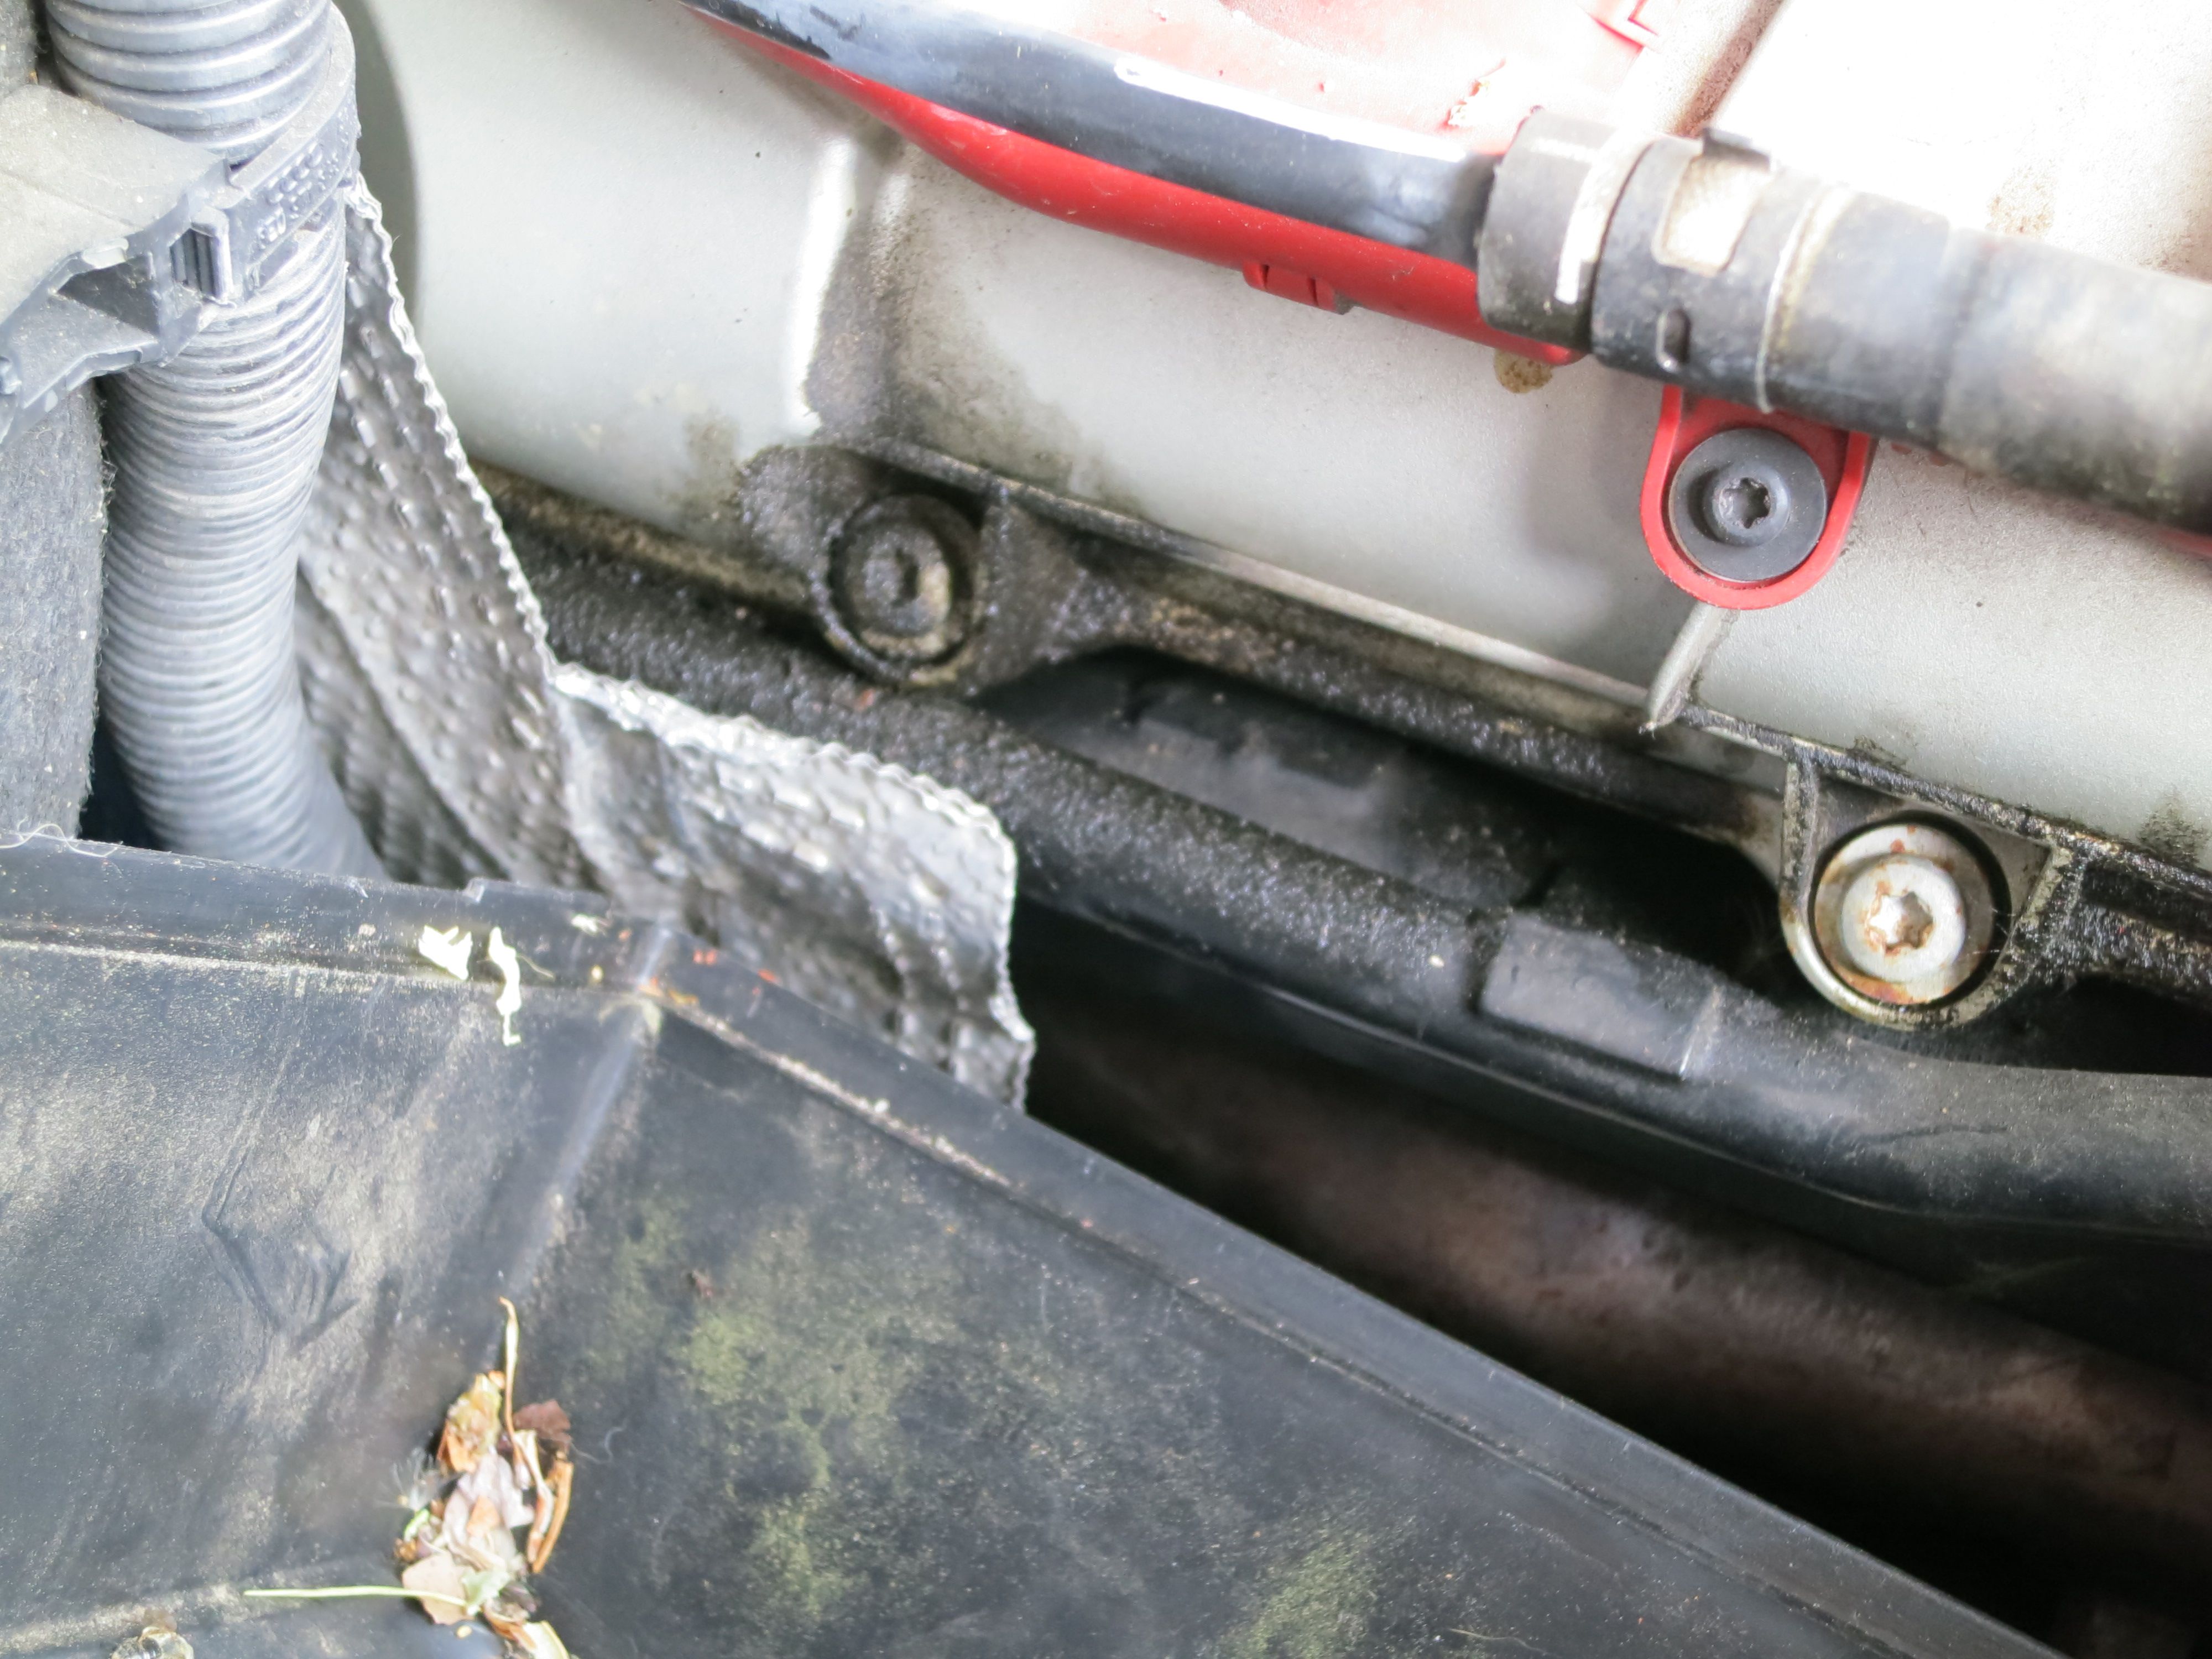
Here are the pictures the service advisor sent me showing the leaking valve covers, taken while the bumper was in the service position to change the ribbed belt (not sure I see anything here other than a dirty engine, but I suppose there is some oily stuff that presumably came from the valve covers):
I ordered gaskets from genuineaudiparts.com, site is a little confusing, gaskets were 077198025B (passenger side), 077198025C (driver side), and I also ordered high temp RTV, D176501A1. Not sure who exactly made the parts but they were clearly OEM, made in Germany and packaged in VW group boxes. $48 for each gasket, I think the dealership wanted something over $90.
There is an excellent DIY by Joey Cuccaro on this here, and I also pulled down the erWin manual, pages 186-190 of this guy. Not going to redo any of the good work Joey did here, just going to add the things I think are worth adding.
Figured I would start with the easier (driver’s) side first.
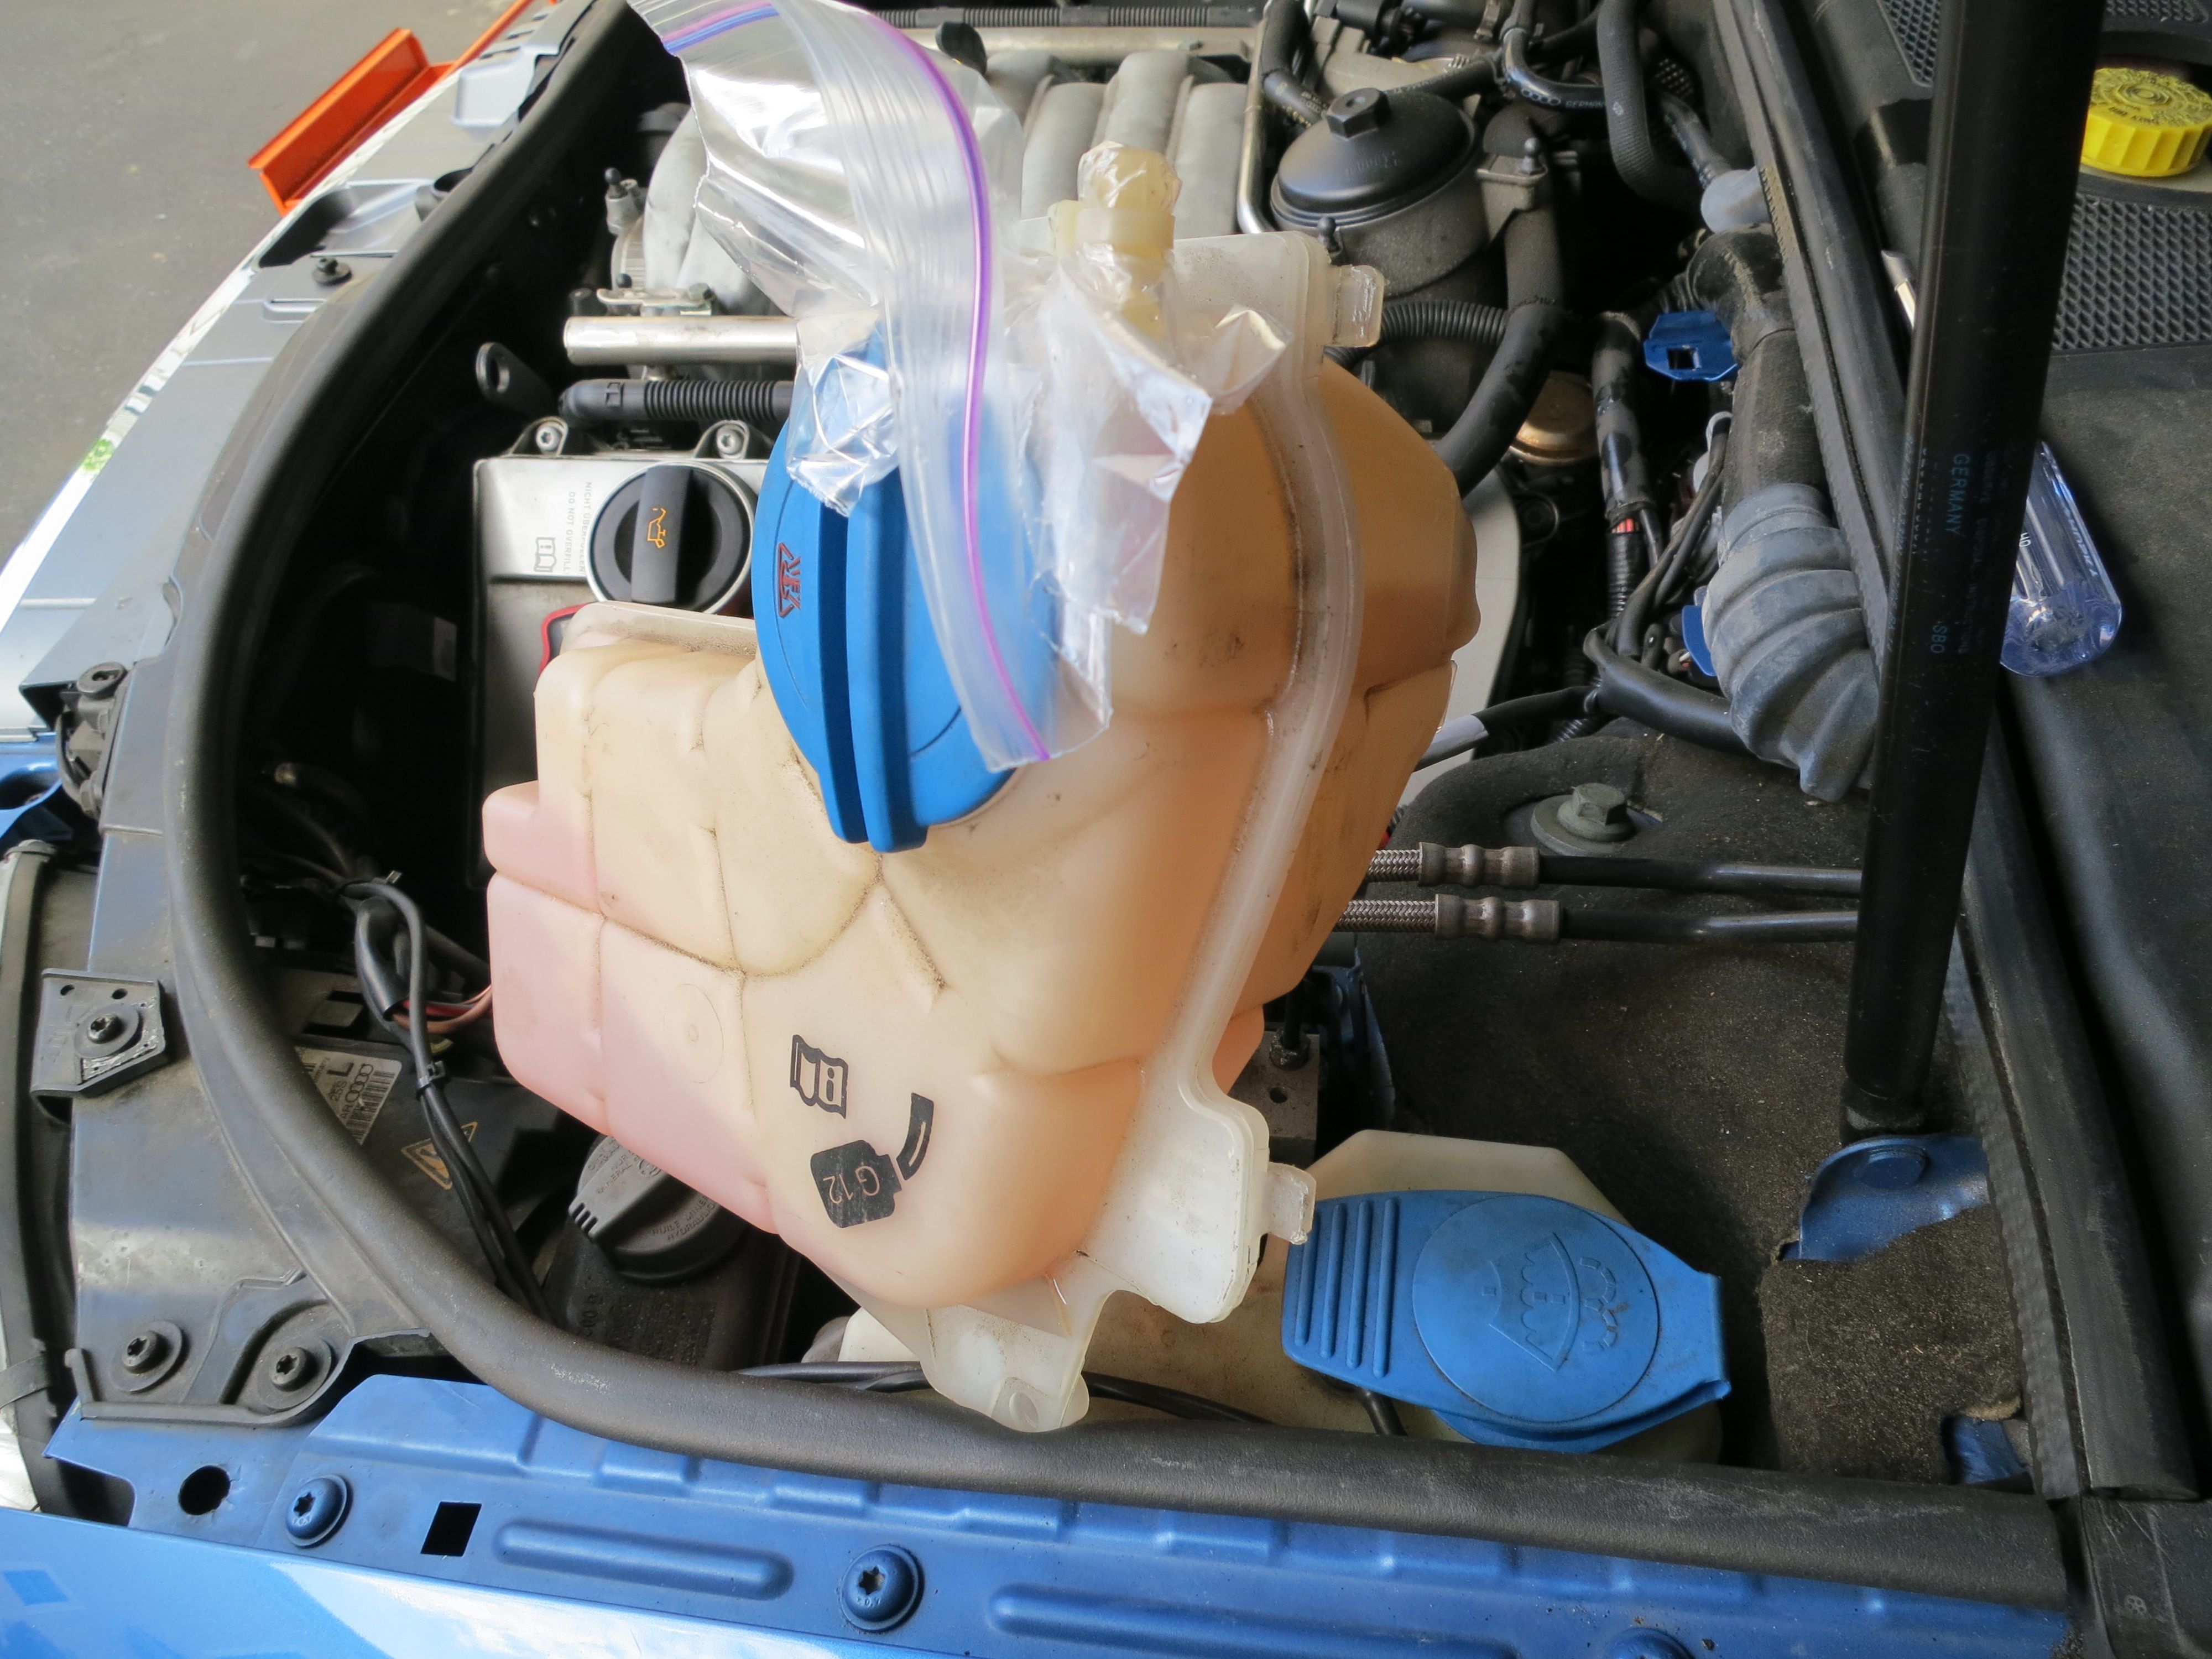
I should have popped the cap of the coolant reservoir before taking the overflow hose off, because when I did there was some pressure and some coolant squirted out. No biggie, but next time. Also, to move the coolant reservoir tilt the front end up a bit and pop the tabs in the back out by giving the tank a rap or two. Here are shots of the tank tabs and the brackets they fit in:
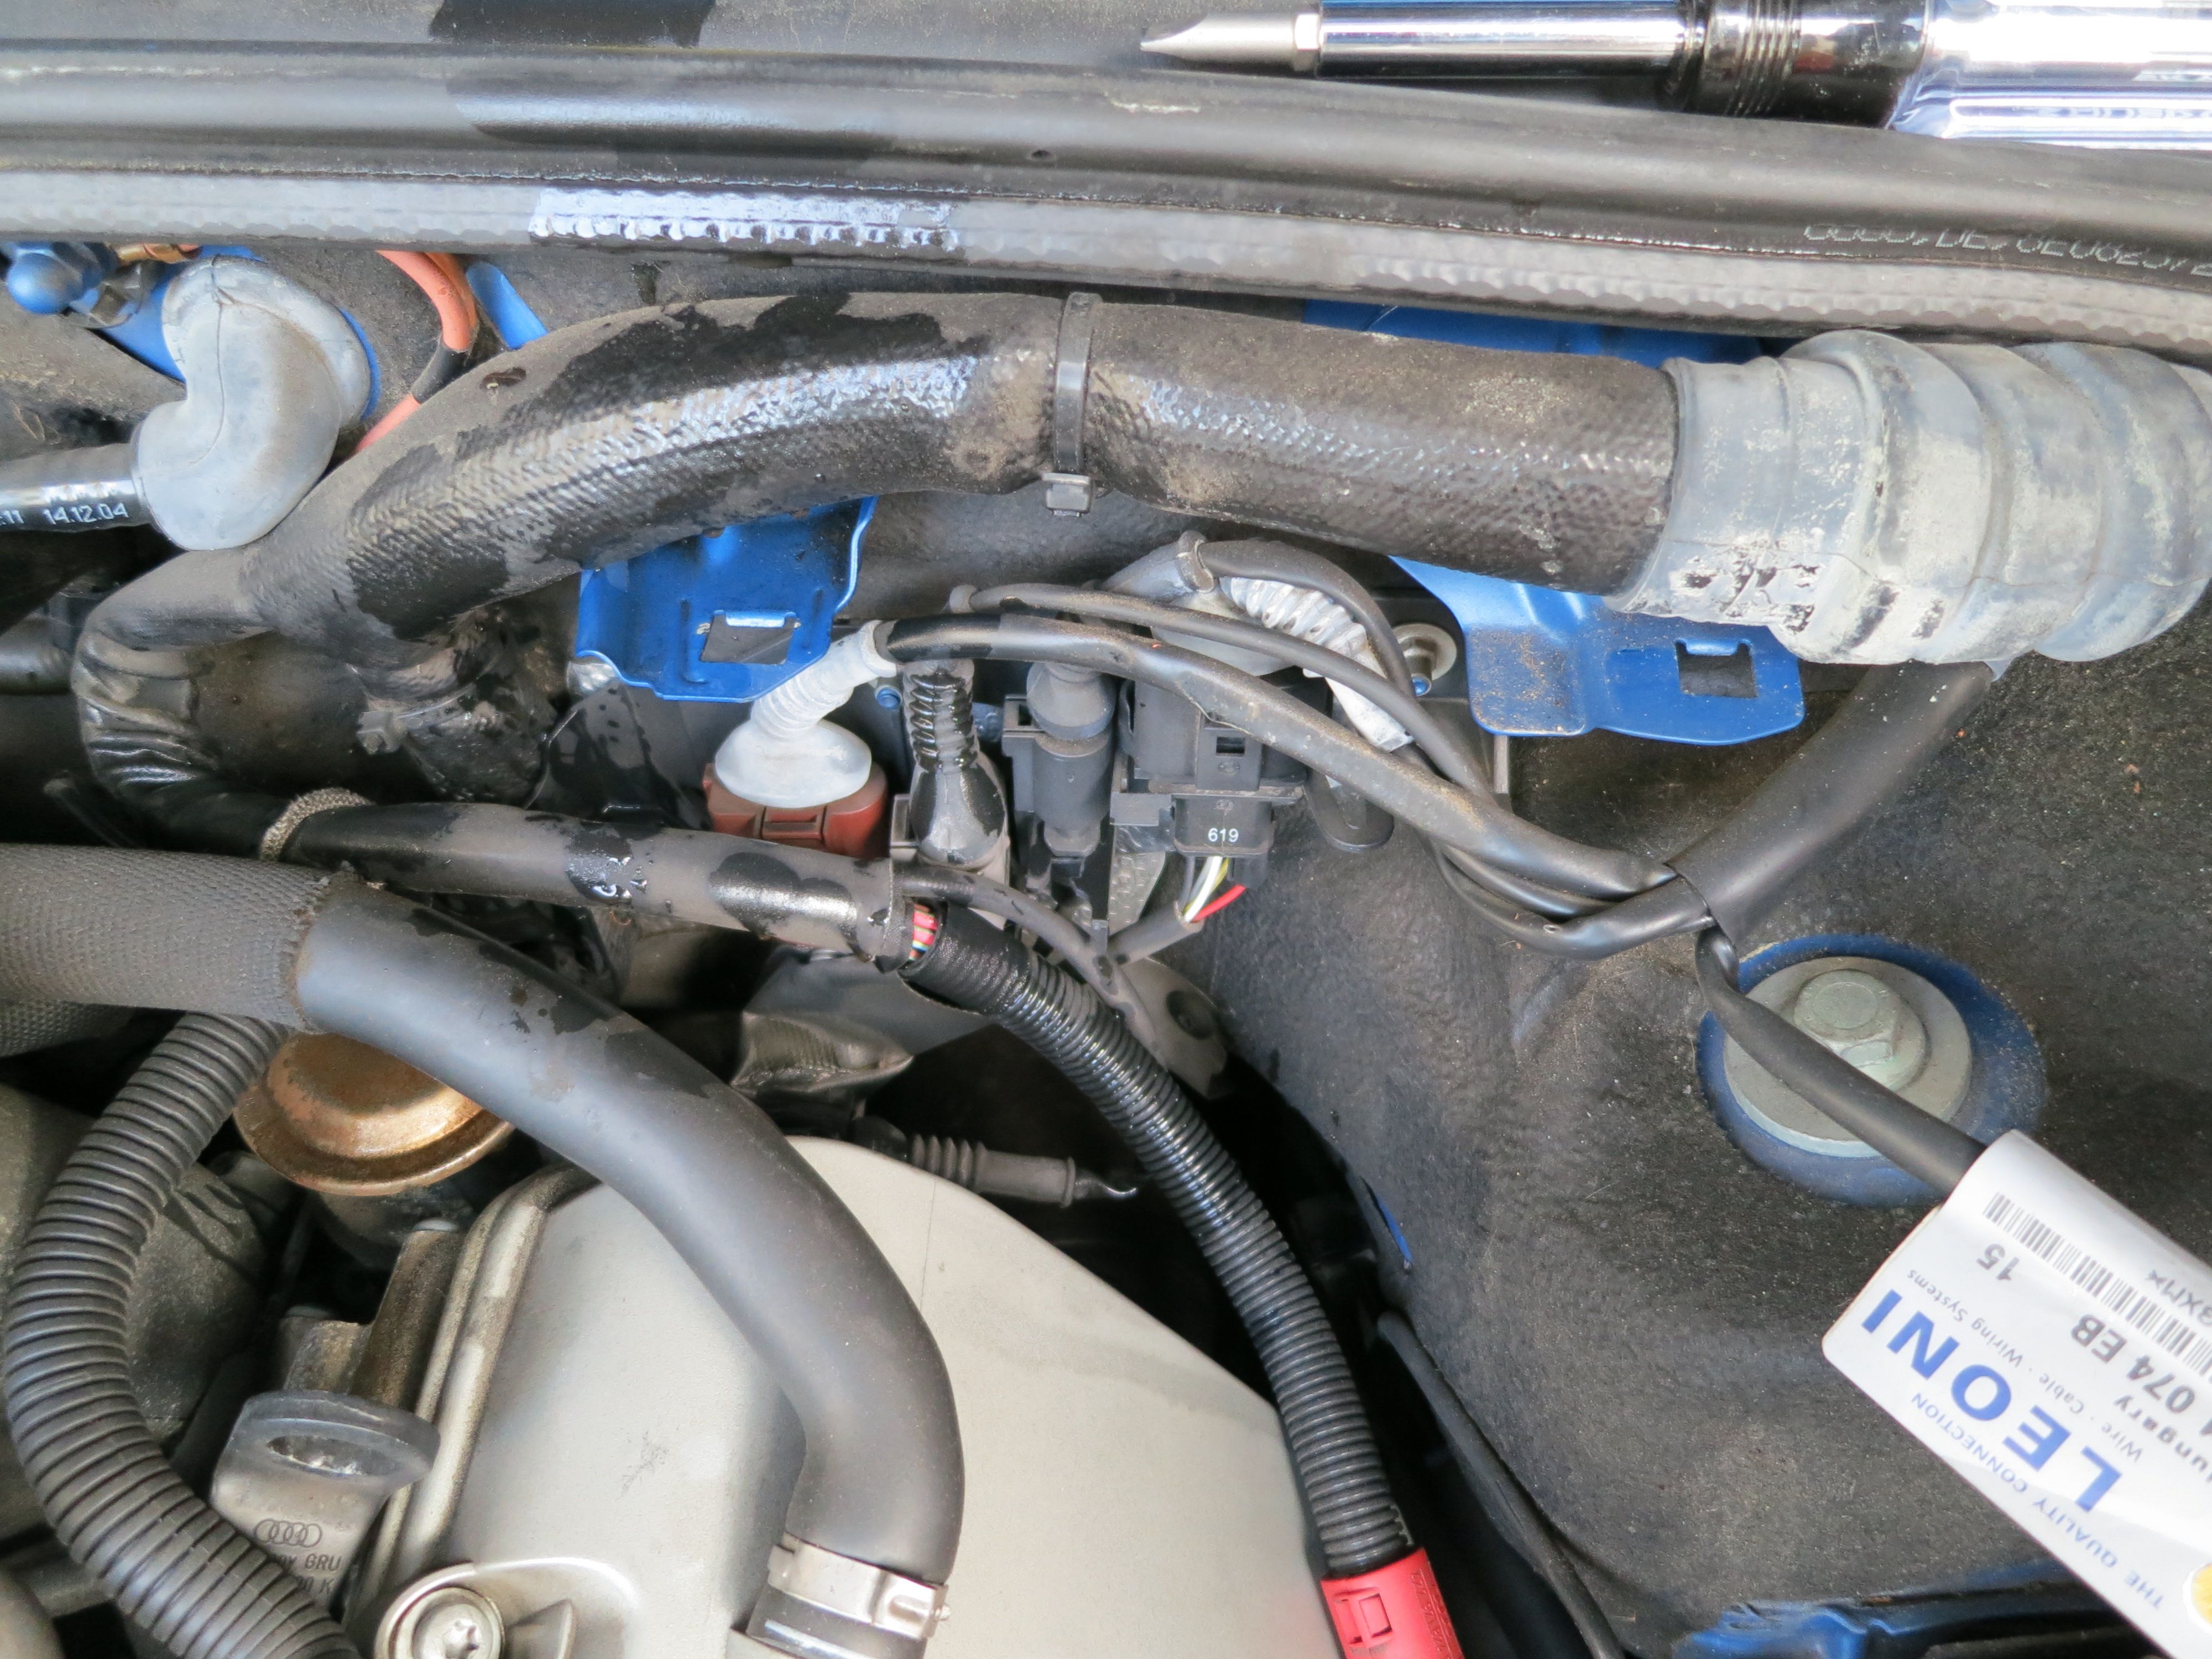
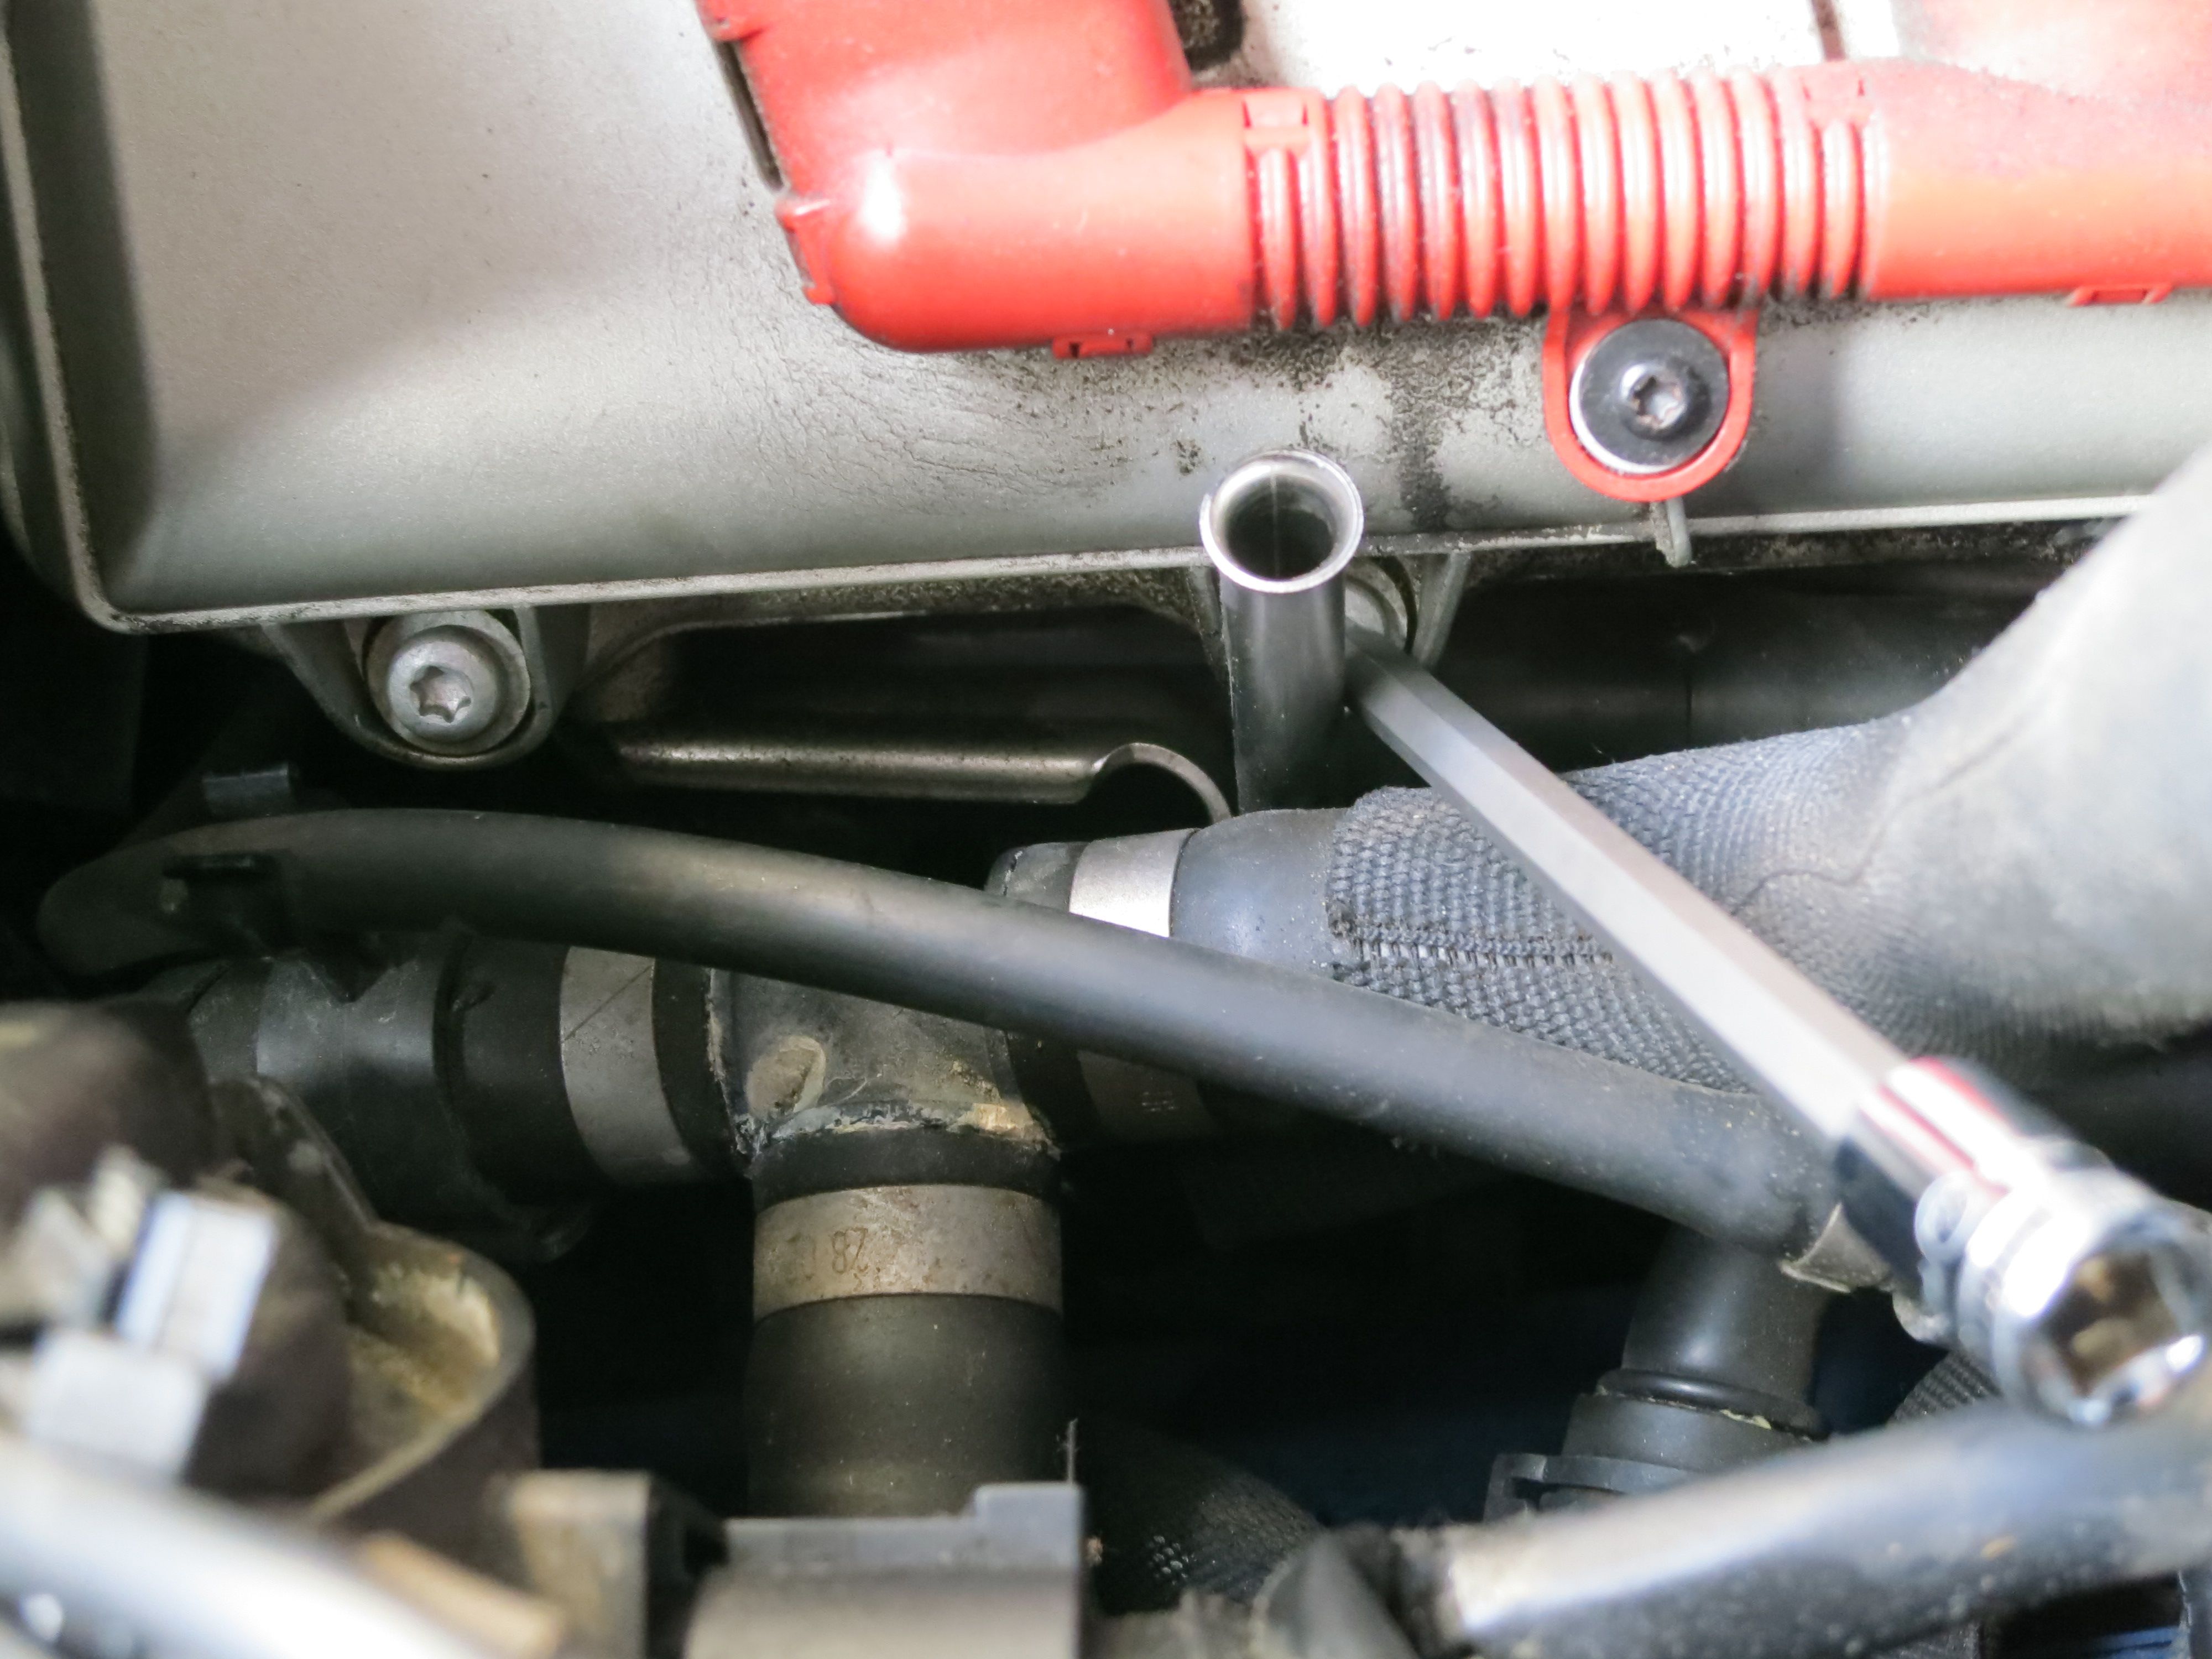
The erWin manual suggest removing a bolt holding the oil dipstick tube in place. I don’t know how you get at that bolt without taking more of the car apart, I couldn’t do it. But with a long T30 bit I could pretty much get at the bolt behind the dipstick tube:
 I didn’t have any trouble loosening the bolts (actually one of them was a little loose already, maybe I should have tried re-torquing everything before taking this on). Don’t worry about them falling out, they are held in place by some combination of washers and the gasket. No problem getting at the back lower bolt if you have the tools Joey recommends. Pretty soon I had this!
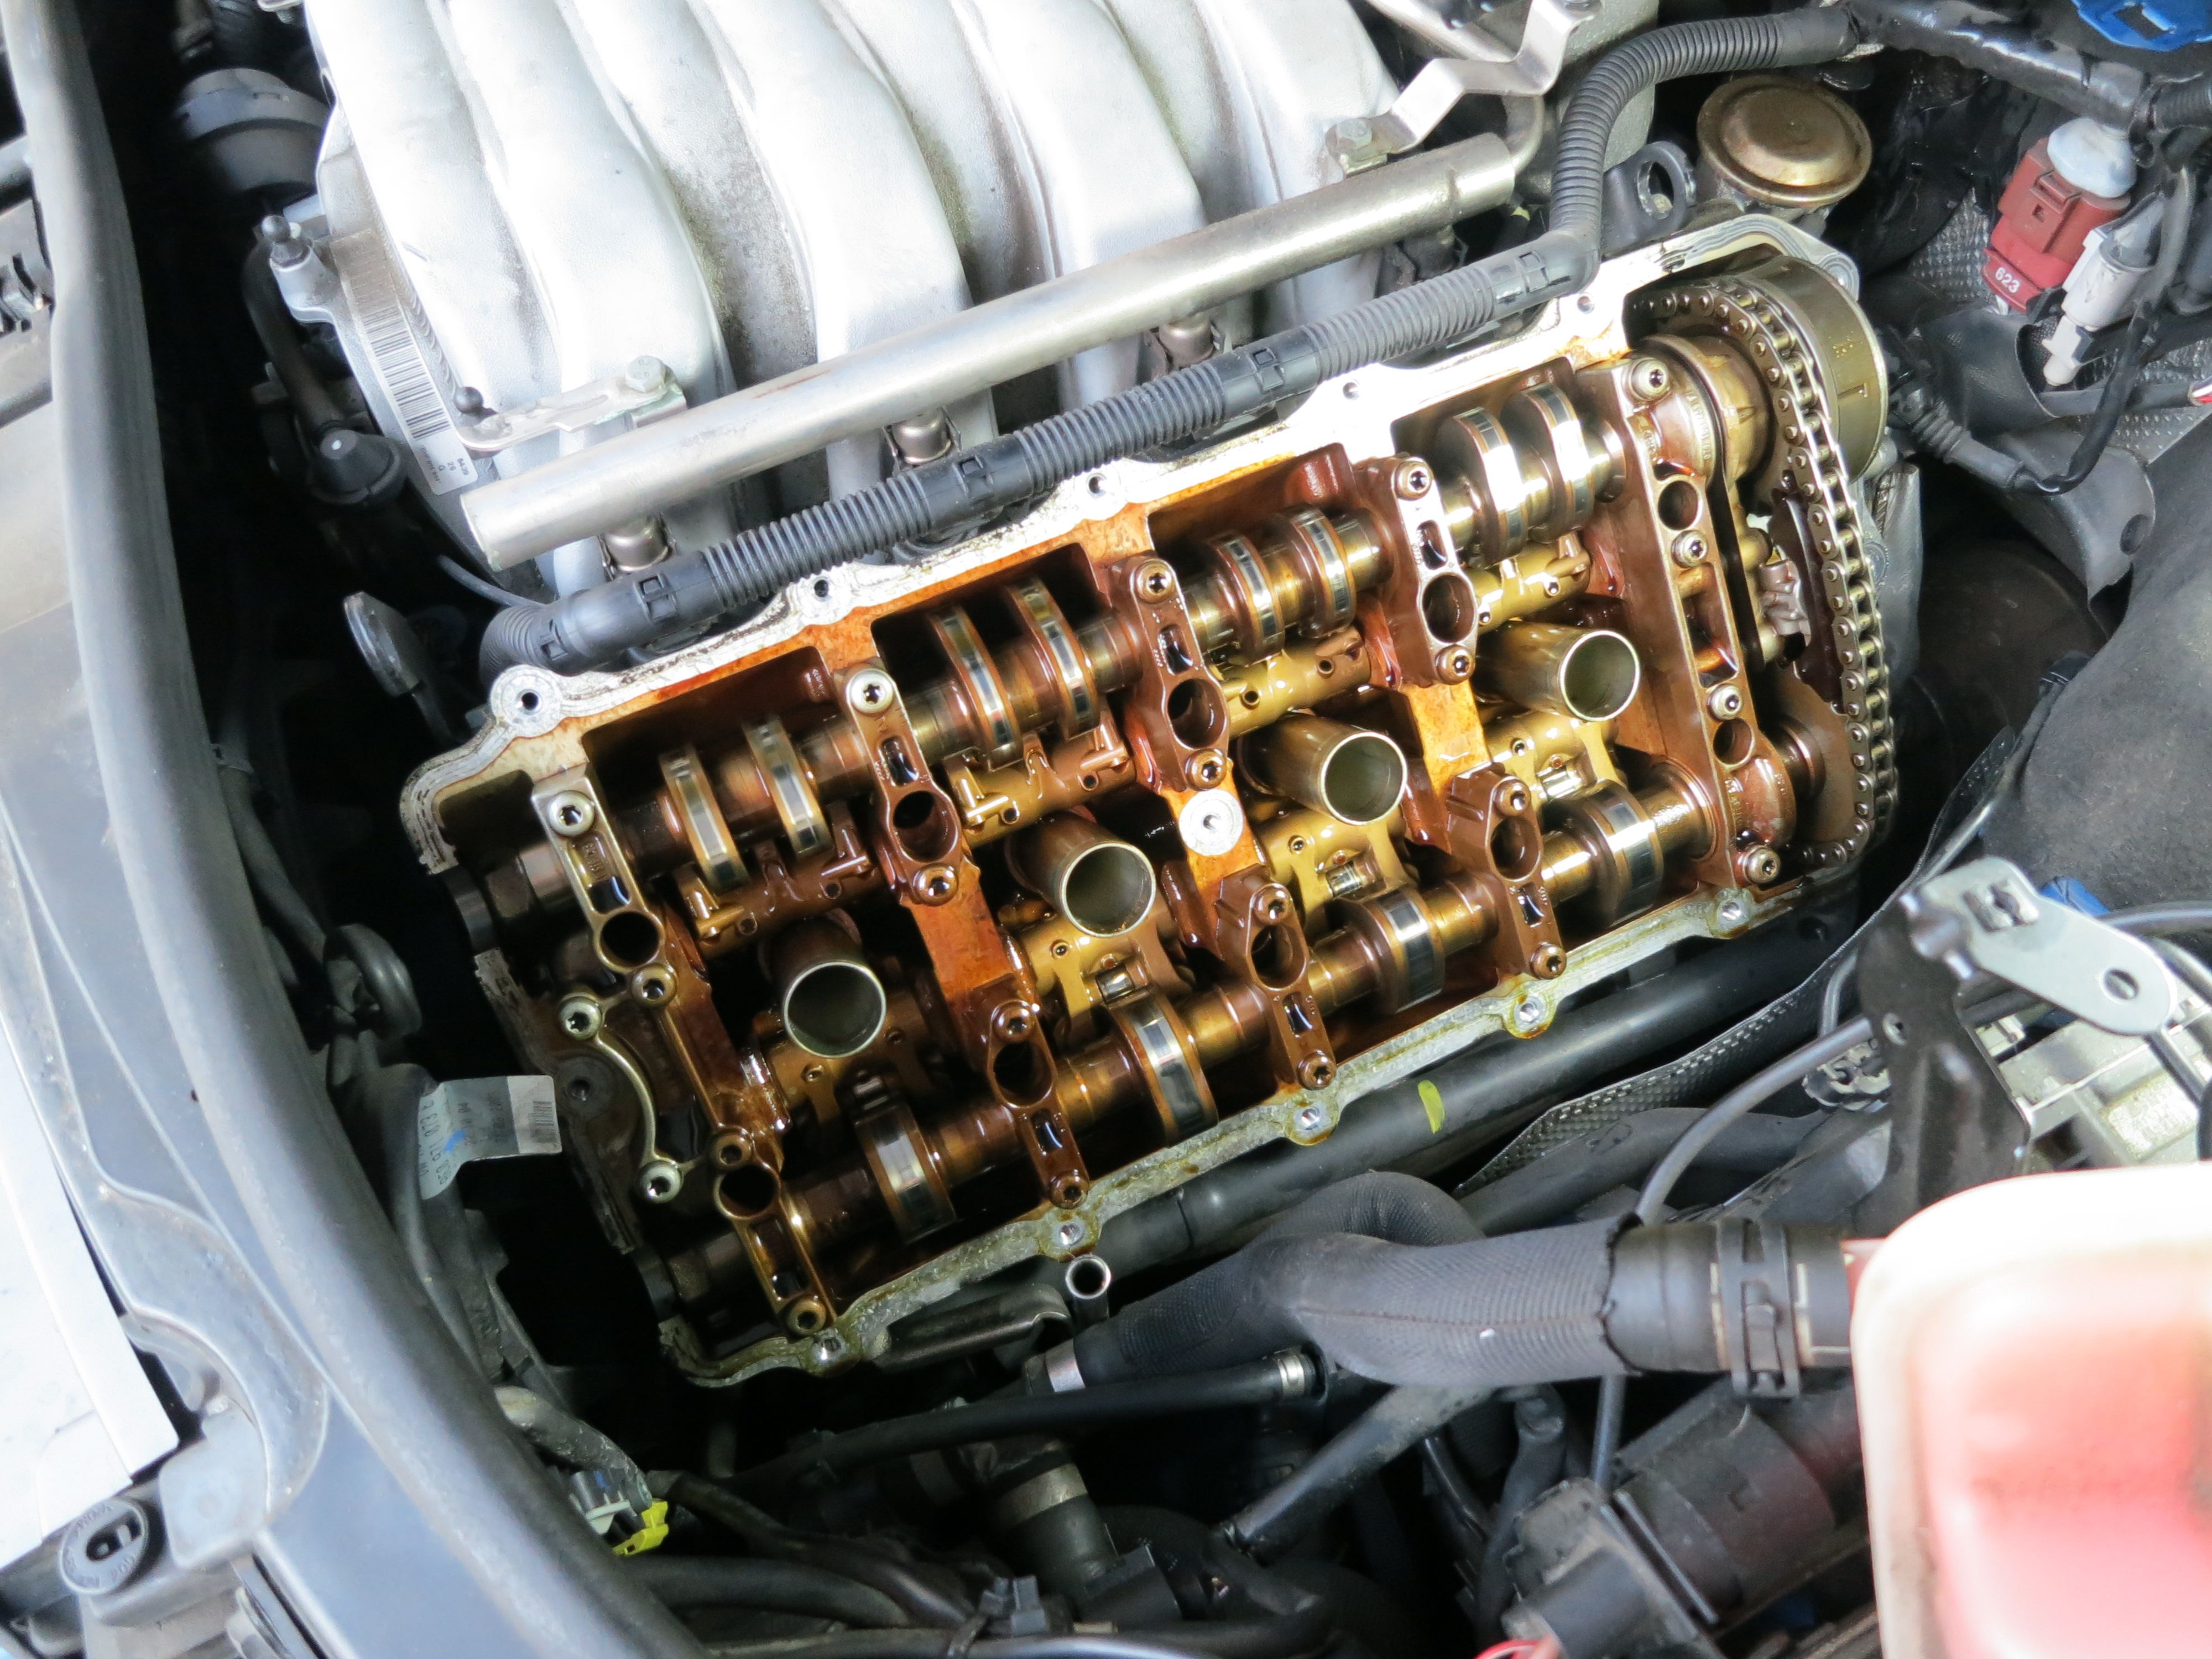

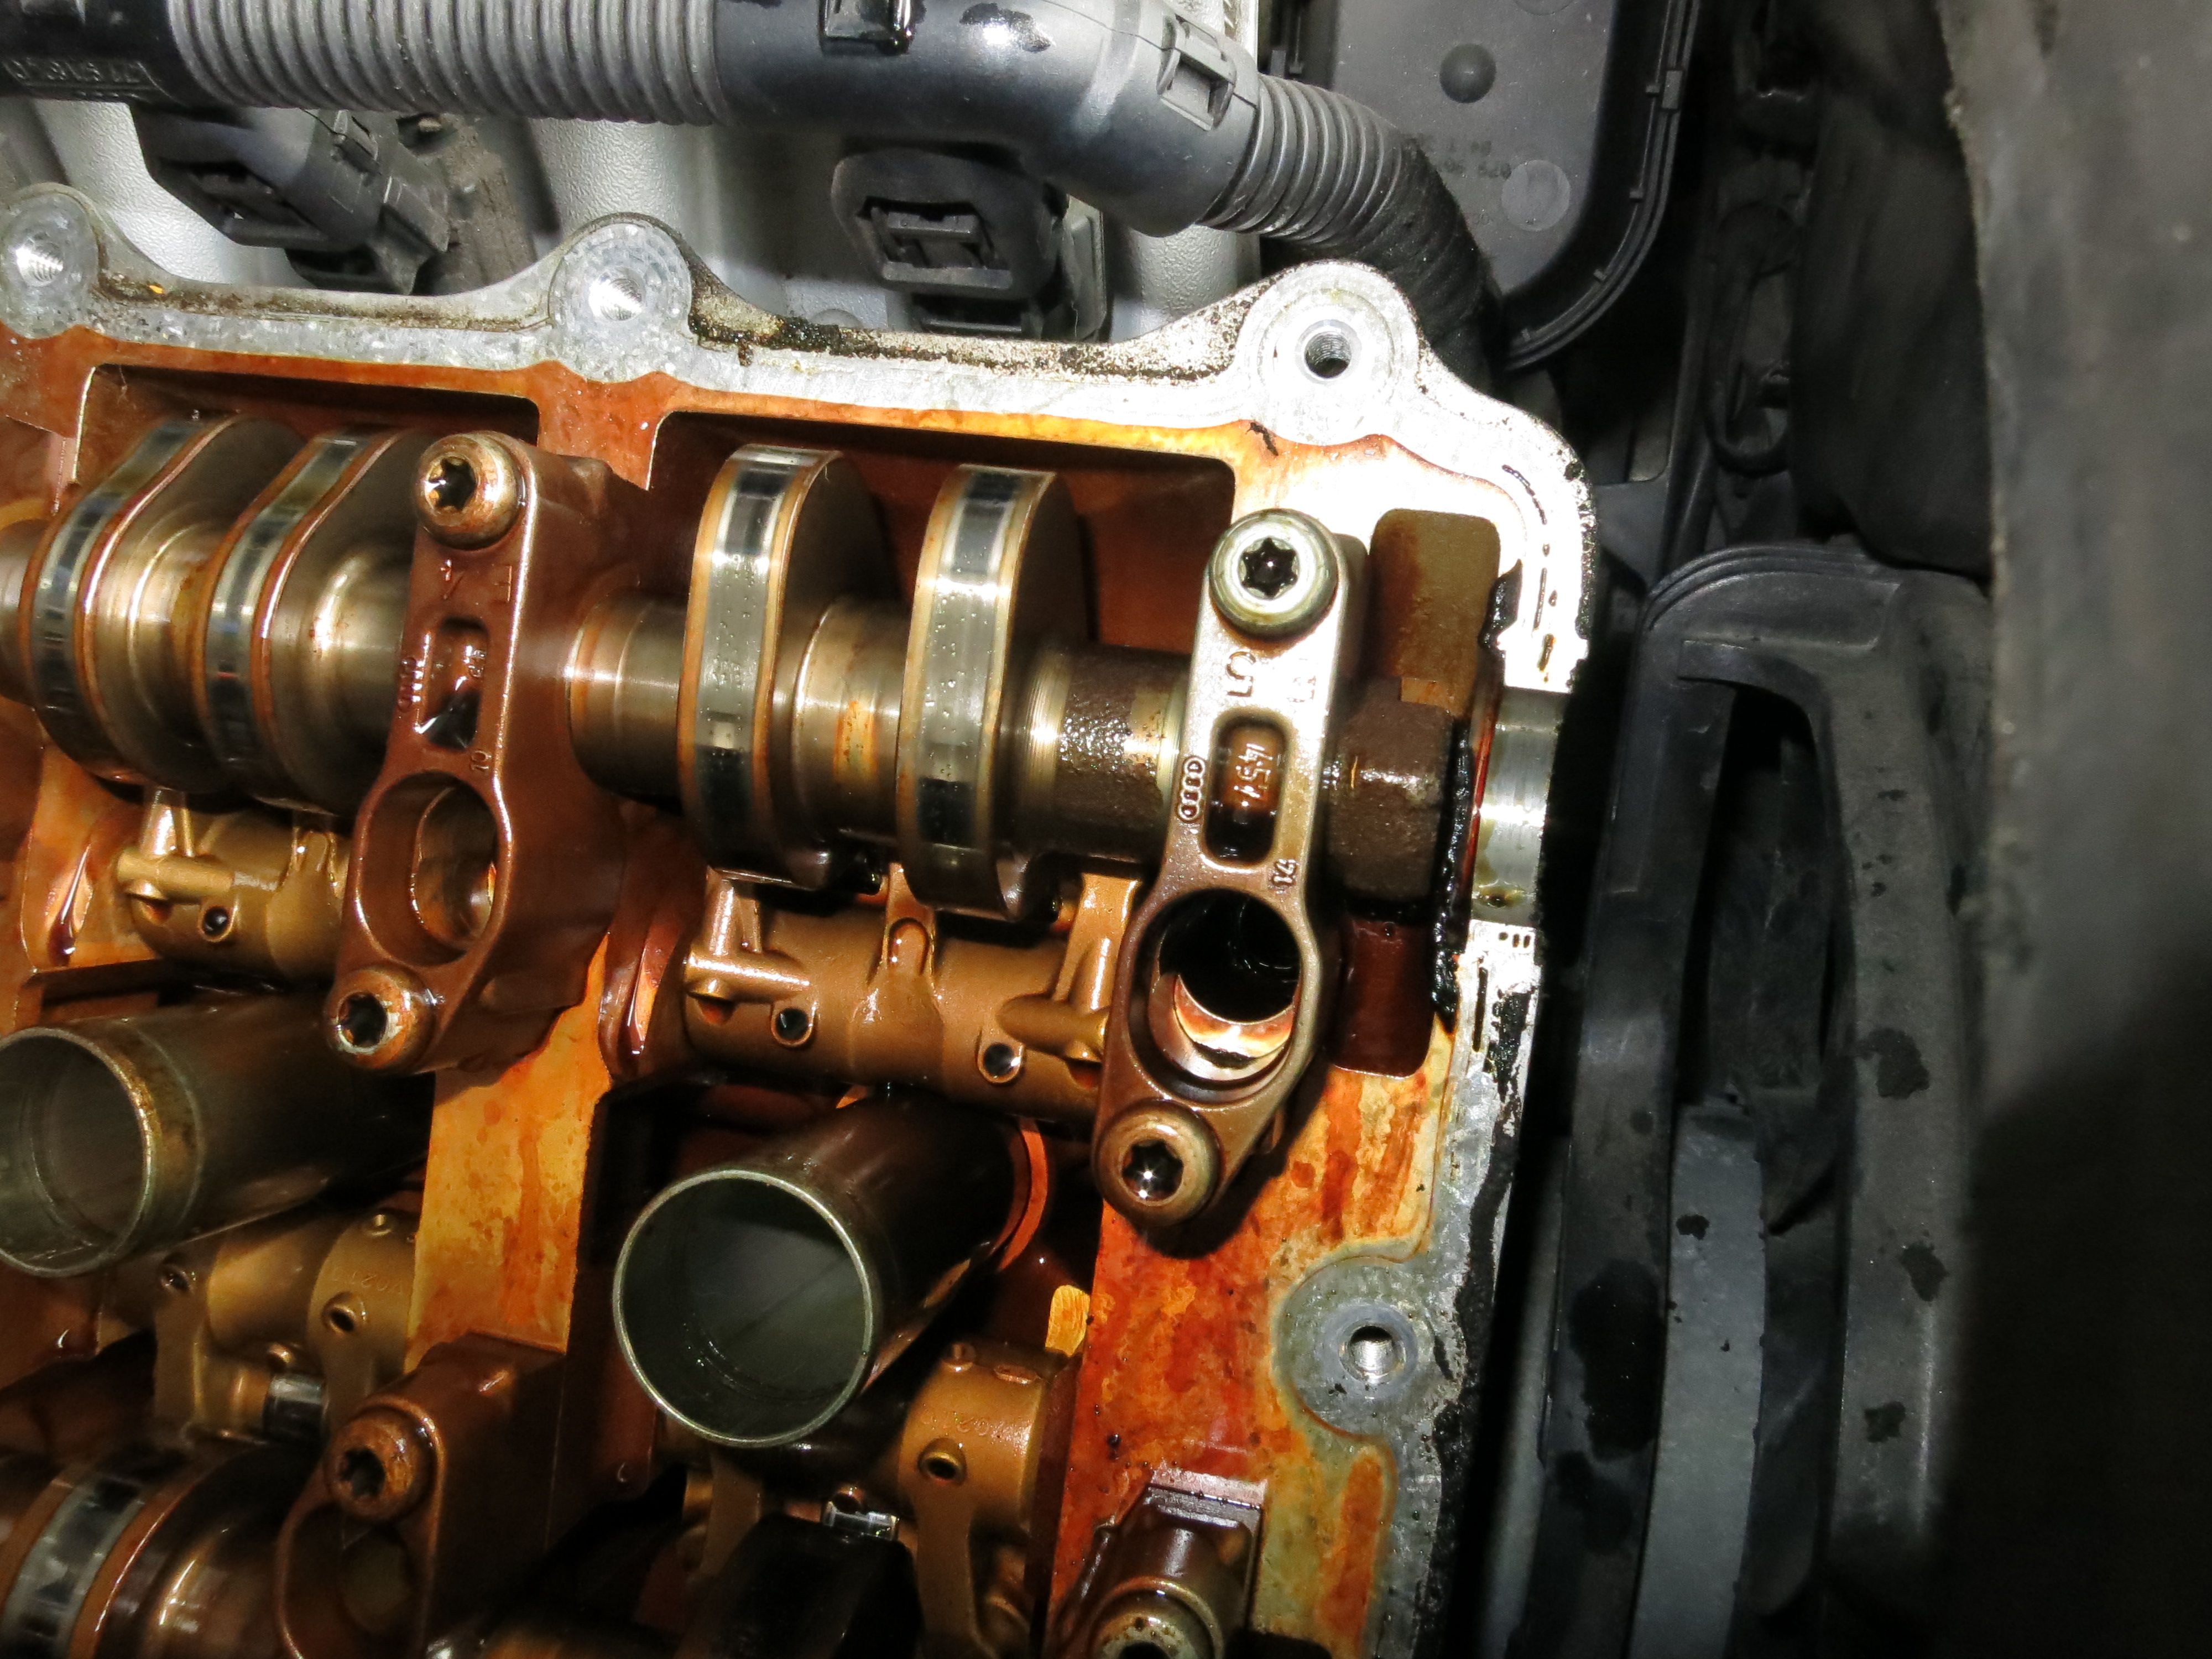
The half moons on the back edge came off with the cover, and the ones in the front stayed on the engine. I dropped one of the front ones where it was out of reach and poked it down so it would not get in the ribbed belt, hopefully it made it to the belly pan and fell out. So maybe be a little careful about the half moons. Factory had clearly used some RTV around the corners and the half moons, which I cleaned up as part of the surface prep. The old gasket seemed like it was in very good shape, plenty elastic, didn’t look smushed anywhere, etc. Back to my thought on re-torquing bolts before taking this on.
It was hard getting the coil pack seals off the cover. I tried to push them off from above, but most of the work was done with pliers, levering them off from inside the cover, they eventually popped off after applying quite a bit of pressure.
I decided not to use RTV for the new gaskets, which are T-shaped and fit very nicely into the valve covers. I think RTVing the corners might be from flat gaskets where holding the gasket in place is an issue. I don’t think these gaskets are going anywhere, and the erWin manual says nothing about using RTV. I did coat the half moons lightly with oil.
I torqued the bolts down using the pattern in the erWin manual, clockwise from top left it is 15, 13, 6, 4, 9, 11, 2, 12, 7, 5, 8, 10, 14, 3, and the center bolt is 1. Manual says 10 Nm, but for a number of the bolts it is hard to get at them and I don’t know how you would even hook up a torque wrench. Joey suggests a quarter turn after snug, but maybe my snug is snugger than Joey’s, because I didn’t want to go much past 1/8th of a turn past snug, and I checked a couple of bolts with a torque wrench to make sure I was in the right zip code. Firm with a short 1/4 drive handle.
A couple of the coil packs had a little oil on the end, maybe I should have peered down into the spark plug recesses to see if there was something bad going on there. But engine is running fine and I pull codes with Ross-Tech’s VCDS every once in awhile. Hopefully no big deal.
Whole thing took me three hours, but I work slowly/carefully, take breaks, look around, etc. I bet I could bang it out in less than two hours next time. We’ll see how the passenger side goes next weekend …
Inexpensive Virtual Data Room Solution
As a small business owner working in financial services it has always bugged me how expensive good virtual data room solutions were, with pretty much anything that is any good only being offered as SAS (software as a service) with what I always thought was overly high pricing (two if the biggies/oldies, Intralinks and FilesAnywhere, don’t even include pricing on their websites, which to me is a red flag). So we have muddled along using DropBox and ftp through a hosting service like Hostgator. Former creates copies of everything on everyone’s computers, and the less tech savvy often have problems with the latter. Neither project a particularly professional image.
I don’t know why I didn’t find it sooner, but I recently stumbled on an application called Rumpus, a “complete internet file transfer solution for the Macintosh.” Here is why I like this application:
- Runs on a Mac
- Users can access a simple to use interface through any browser
- Easy to set up, but good functionality for user permissions, security, and creation of a branded/customized site
- Can log user activity
- Allows users to retrieve and/or change their passwords (with no administrator intervention)
- Reasonable cost, a Mac, an internet connection, and the software is $269 for 32 users/simultaneous active sessions and $449 for unlimited users and 256 simultaneous active sessions
Here are the steps to set up:
- Grab a domain, or create a sub-domain of an existing domain (e.g., files.yourdomain.com), and point it (setting the A record) at the fixed IP address of a Mac Mini (probably possible to set up on an existing server, but I opted for simplicity/stability of dedicating a computer to this service), I also set the reverse DNS with our ISP, but for this service I don’t think this matters (does matter for a mail server)
- Acquire and set up a SSL certificate (you could do self-signed, but for the professional image I think better to get one from a certification authority, they are cheap anyway)
- Install Rumpus and set up, customize the web settings (keeping simple, or go wild with html templates in the WFMTemplates folder) and make sure connections are forced to HTTPS and FTPS so all data transfers are encrypted
- Set up a folder structure that works for your team, use aliases to control/restrict access for vendors/partners (I created a Partner folder and put a folder for each vendor/partner in there, those users get access to those folders only, then I drop an alias of whatever they need to see in their folder)
- Hook up a big external drive and turn on Time Machine
- Create a backup image of the Mac Mini with SuperDuper once or twice a week (on additional external hard drives), and store at least one of those off site
- Set up users and send them a message with their login into (configure so they can retrieve and change their login info)
I would also add that John of Maxum was EXTREMELY responsive to questions I had, leading to me understanding that:
- Demo version of Rumpus is for both Standard and Pro versions
- You do not have to use Open Directory to set up more than 100 accounts, his view that performance would still be good at 500+ accounts and 20-30 concurrent users
Next up, looking at moving from Evernote to Samepage for team collaboration …
IP Telephony – Polycom SP335 w/ Netgear Router – OnSIP Rocks
Would like to do a longer post on what I have learned about IP telephony, but in the meantime just fixed a problem setting a new phone (Polycom SP335) up at the office and have to say I continue to be impressed by our phone system provider, OnSIP. Never have to wait long to speak to a real person, no ridiculous prompts to navigate, and very capable and patient technical support. I was having a problem getting this phone registered with our provider, they were able to look at what was going on remotely, identified the router as the likely culprit, and steered me to a setting that needed to be changed, in WAN Setup, NAT Filtering, I had to check the Disable SIP ALG and the radio button for Open (instead of Secured). I might have figured that out eventually, but thanks to OnSIP I didn’t have to!
Audi B7 Bi-Xenon HID Bulb Replacement
I have been getting intermittent right dipped beam fault errors for the last year or two or three on what is now an almost seven year old Audi S4. The frequency of these errors has gone up in the last month or two, and I also got at least one of them for the left dipped beam. I was following my wife one night recently and she told me one of my headlights was out — I hadn’t realized this error meant the bulb wasn’t on at all, I thought it was related to the adaptive control/leveling mechanism. But the error message is a little confusing, by “dipped” I think they just mean the low beam bulb, and the error symbol is on fact a bulb with an error symbol overlaid on it.
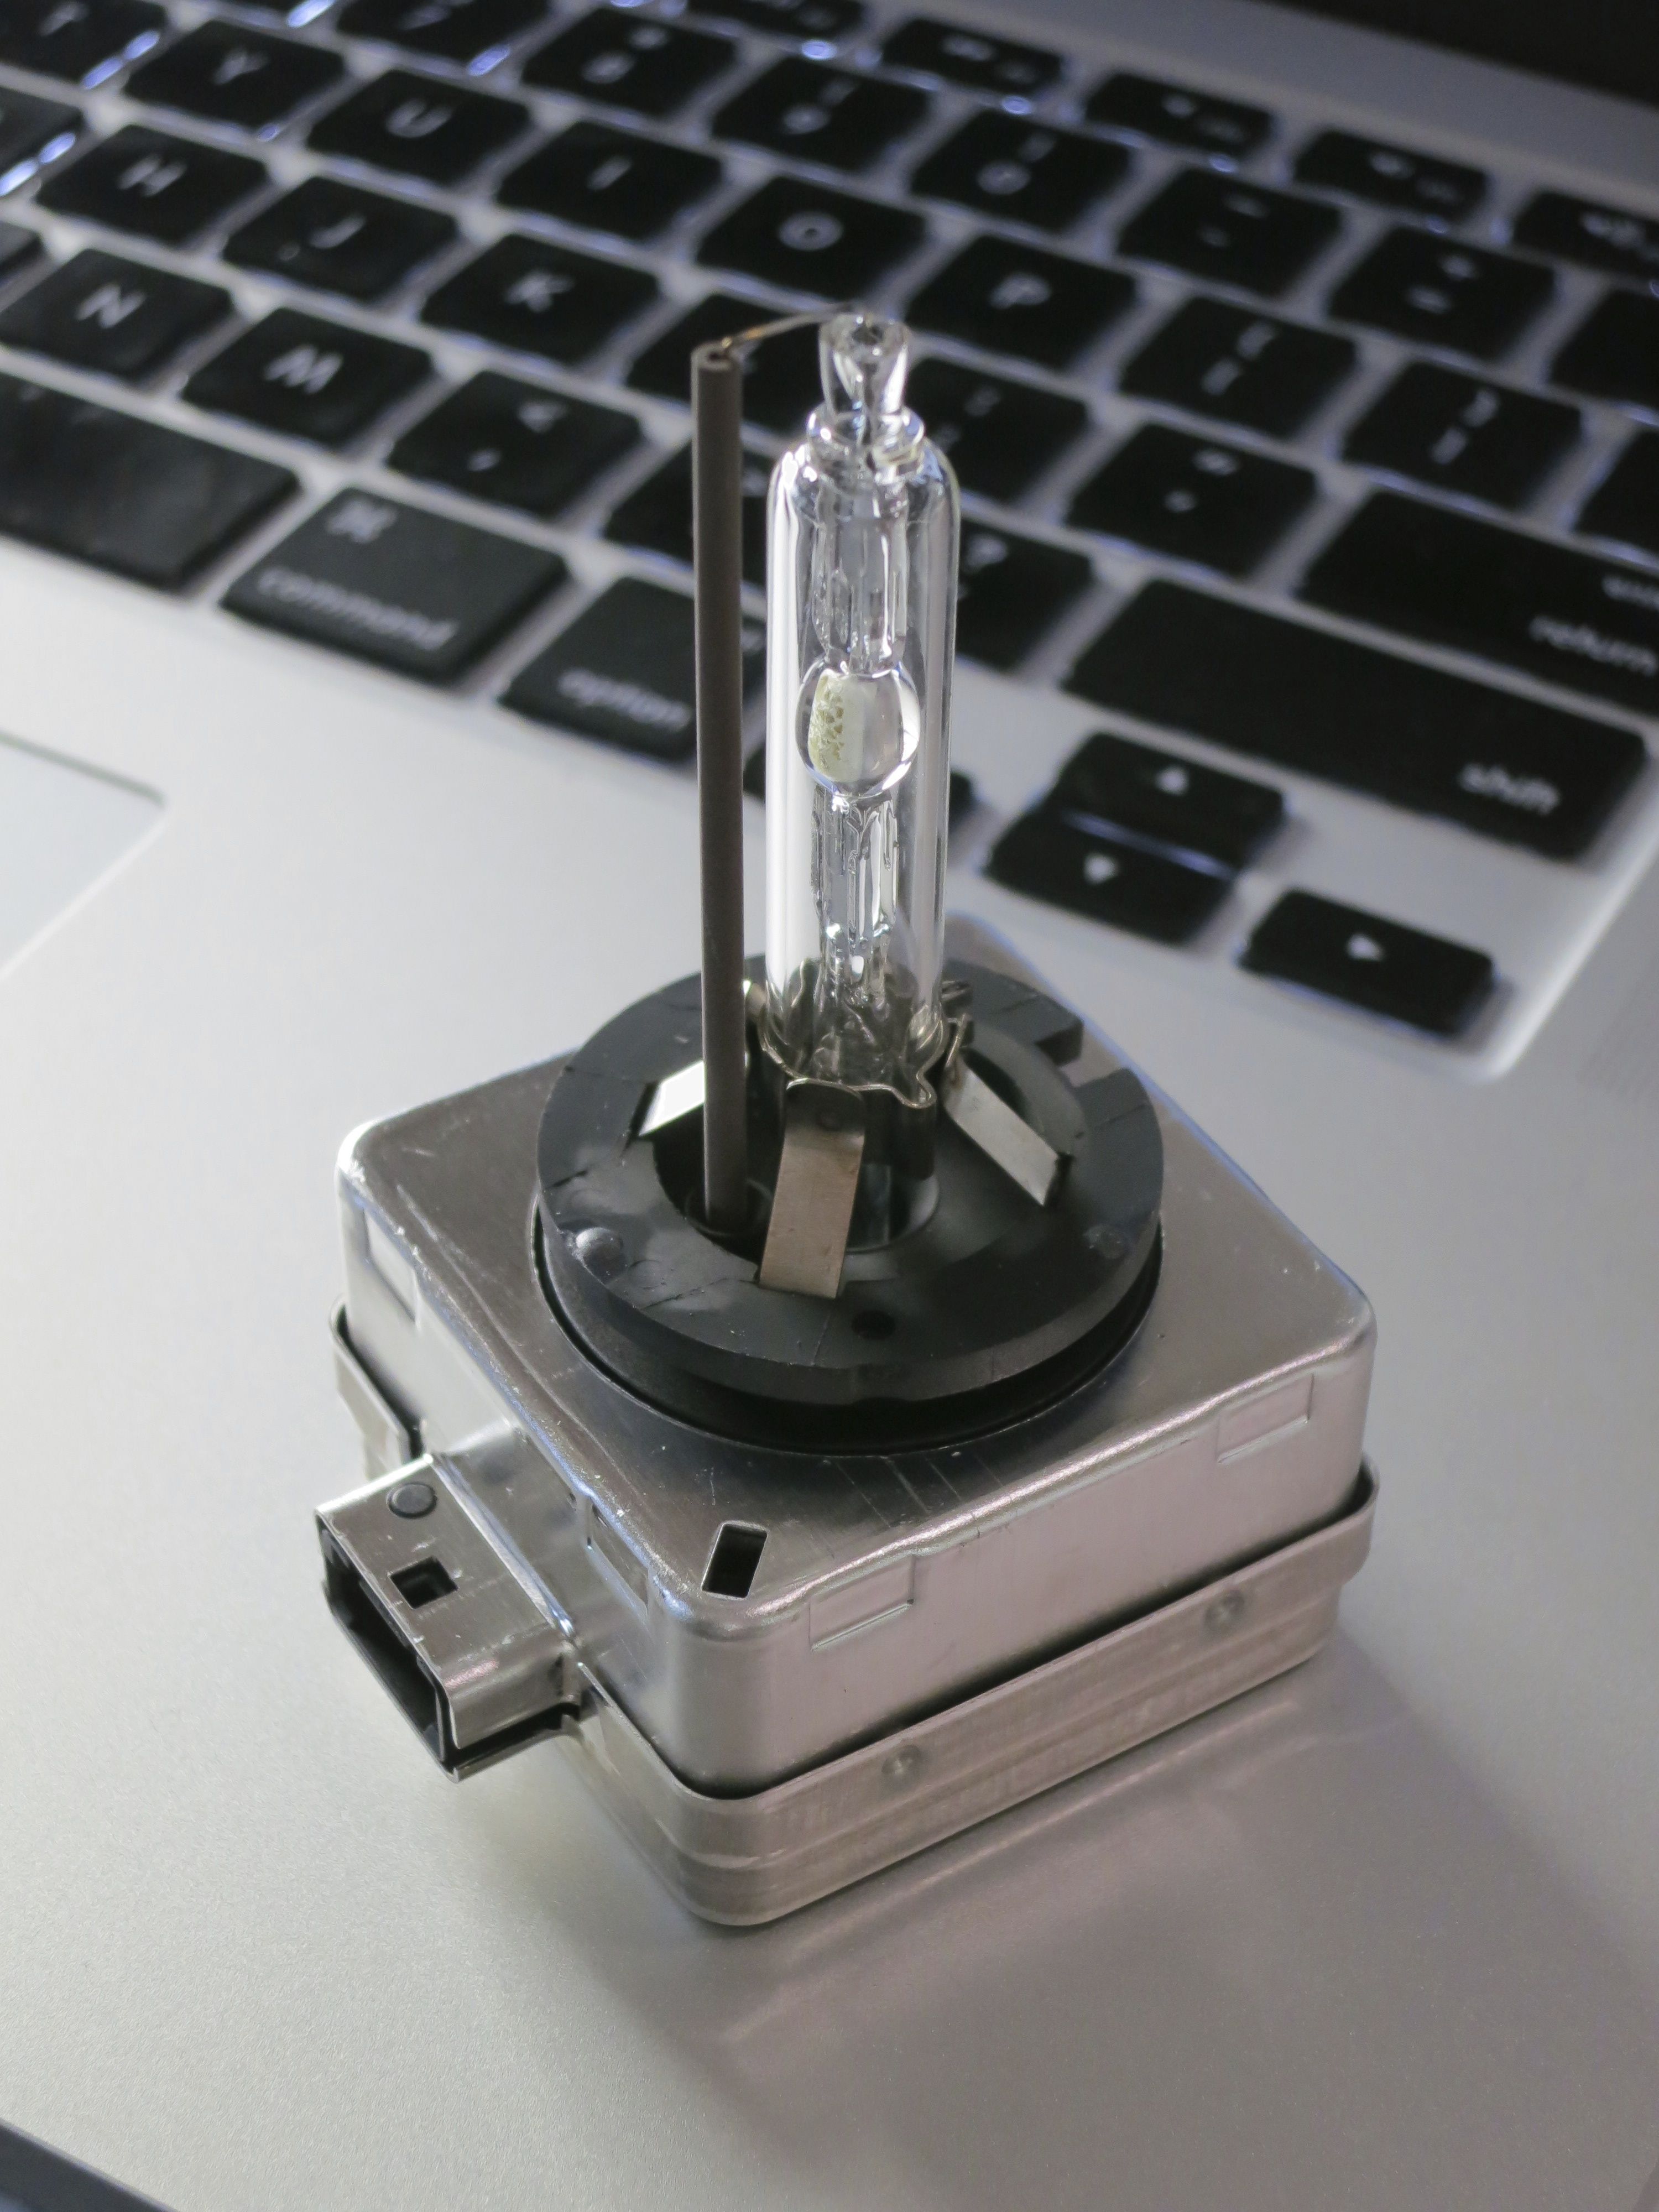
So poked around a bit and decided to replace the HID bulbs, best done in pairs, and most likely the source of the problem. Could also have been the ballasts, but that seemed less likely so worth doing the simpler thing first.
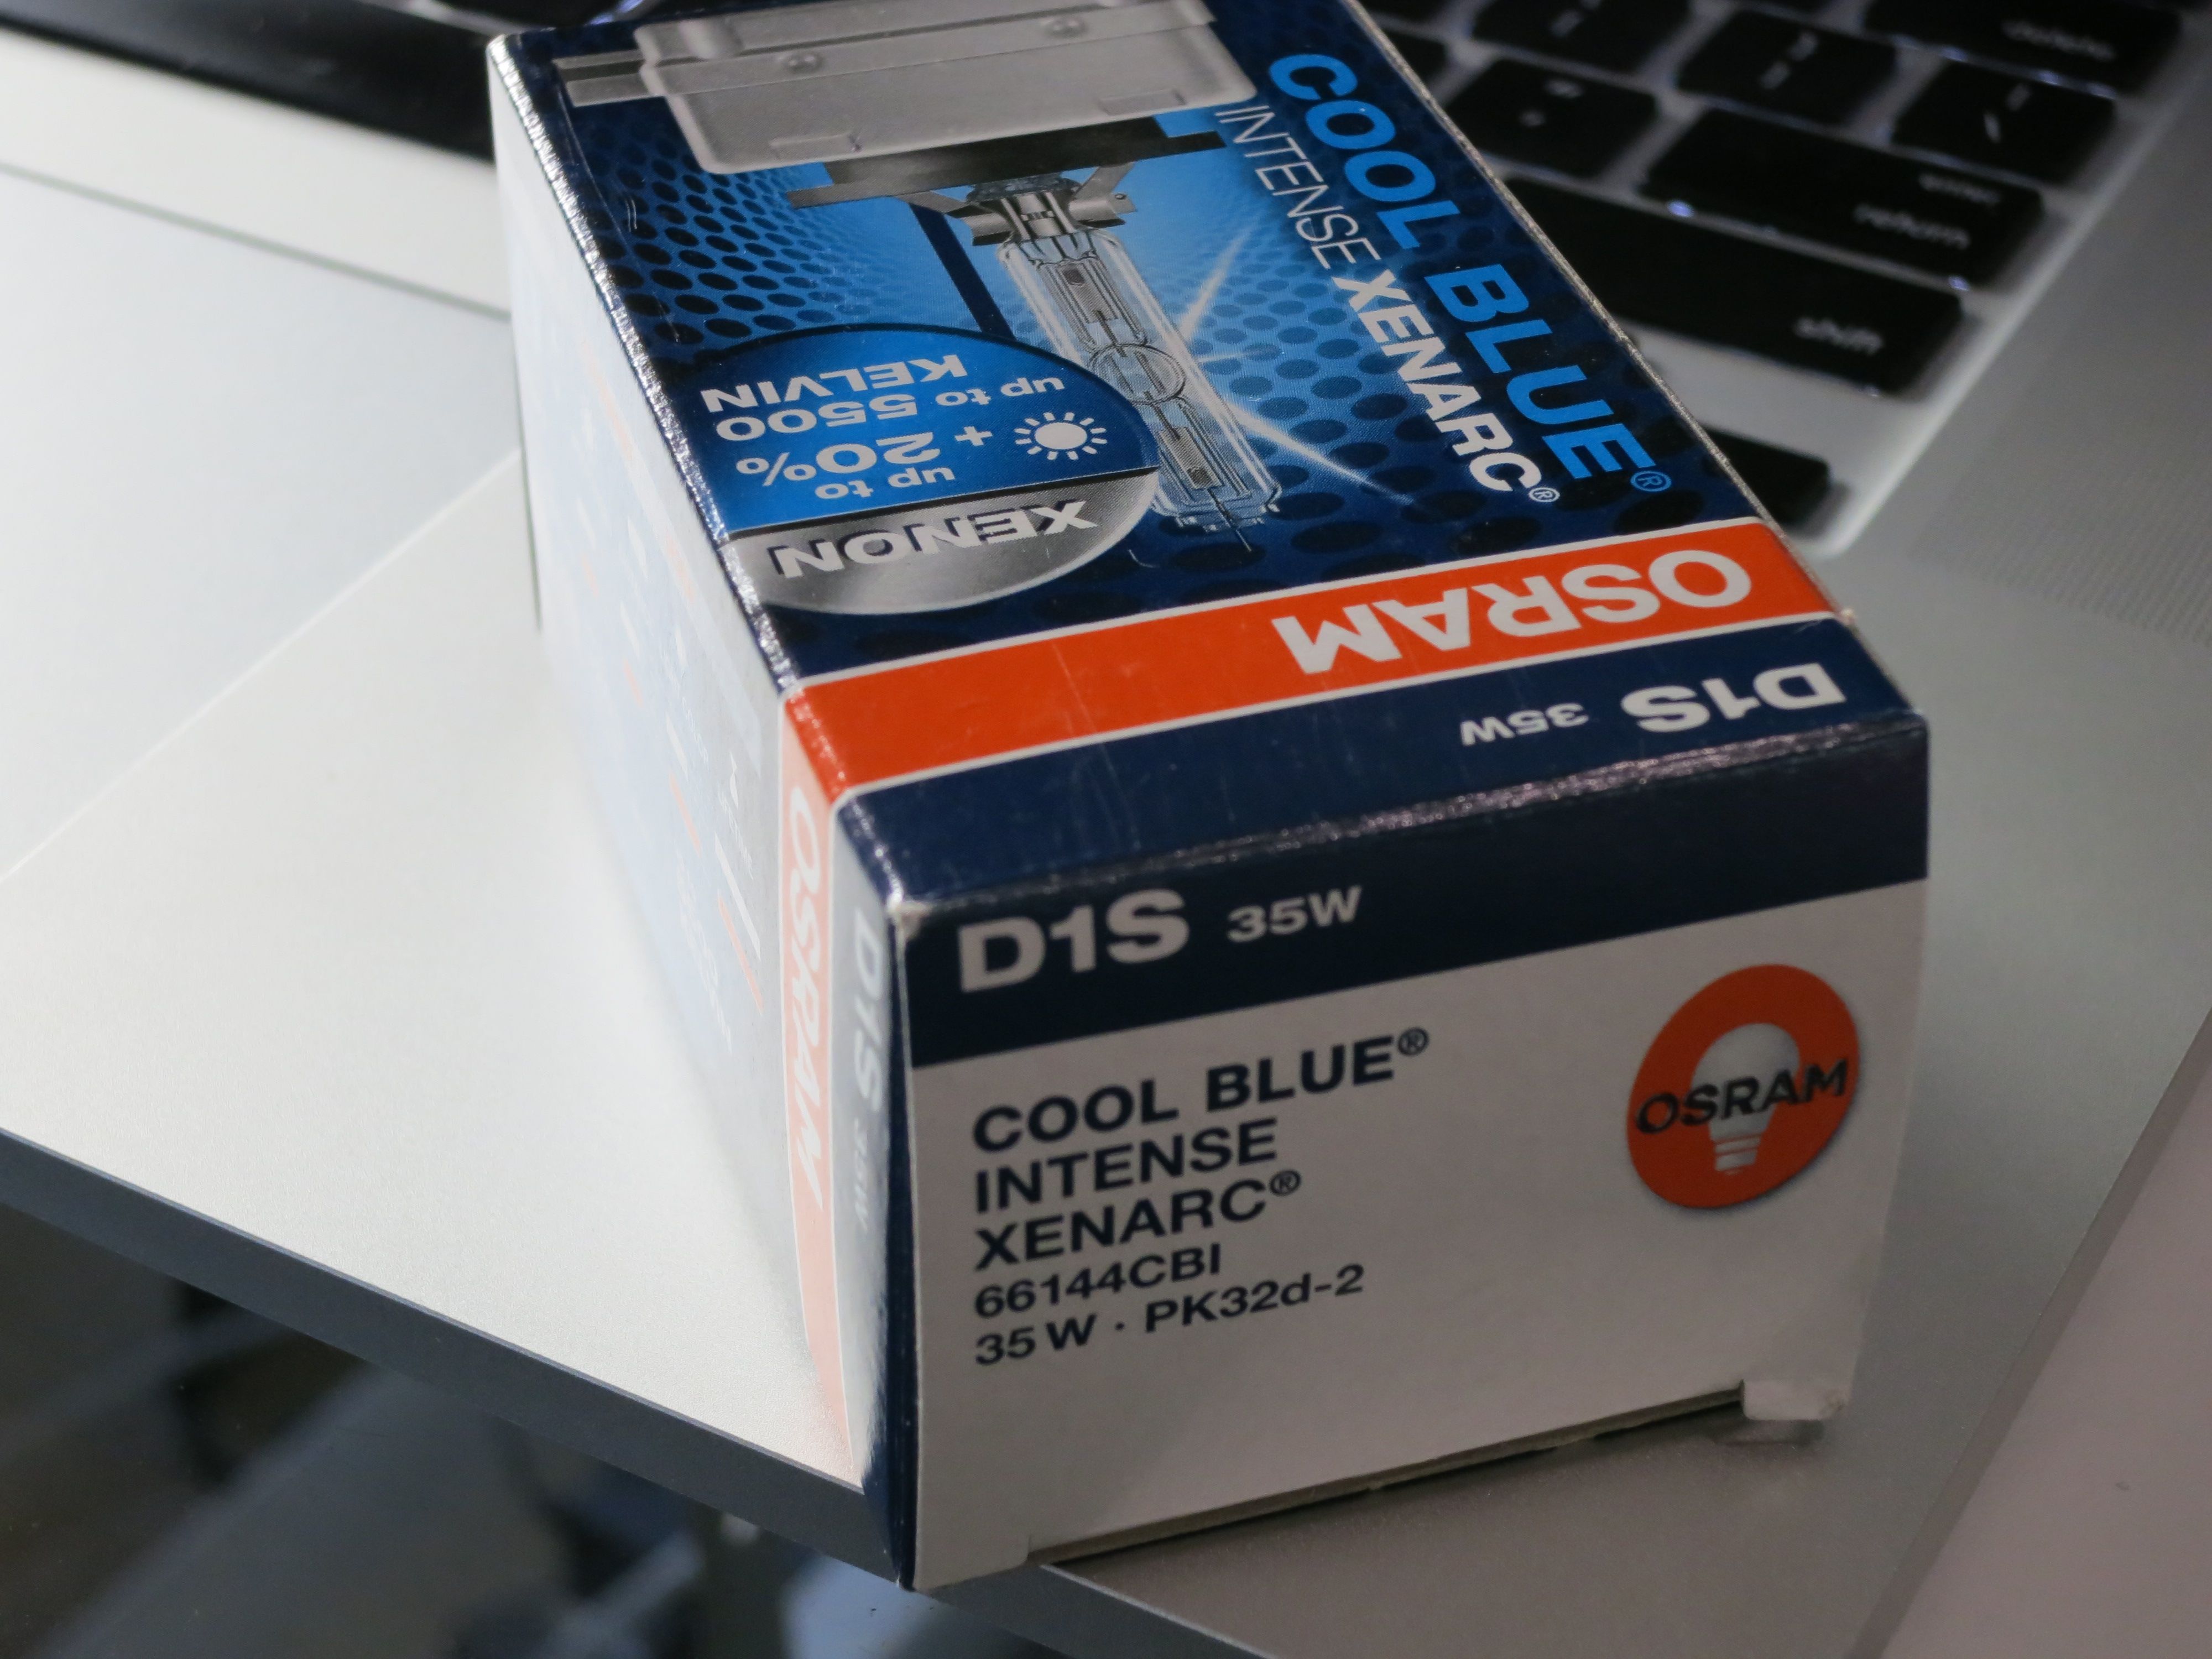
Poked around a bit and seemed like this place was “HID headlight” central, so I ordered bulbs from them. I guess OEM are 4200K, based on bulb descriptions on the site seemed like the OSRAM CBI’s were the way to go, a little cooler/blue in color, but not really blue, just a purer white and in the past I guess that made it harder to get brightness equal to the 4200Ks, but now they have that done in the OSRAM CBI 5000K. These were D1S bulbs, which have a square base that contains the igniter for the bulb. Any D1S would fit. Since I was doing the replacement myself, saving the shop labour, I got what I think are the best, and the most expensive, bulbs, $100 per. But this is less than what Audi would have charged me for a lesser 4200K bulb, I think.
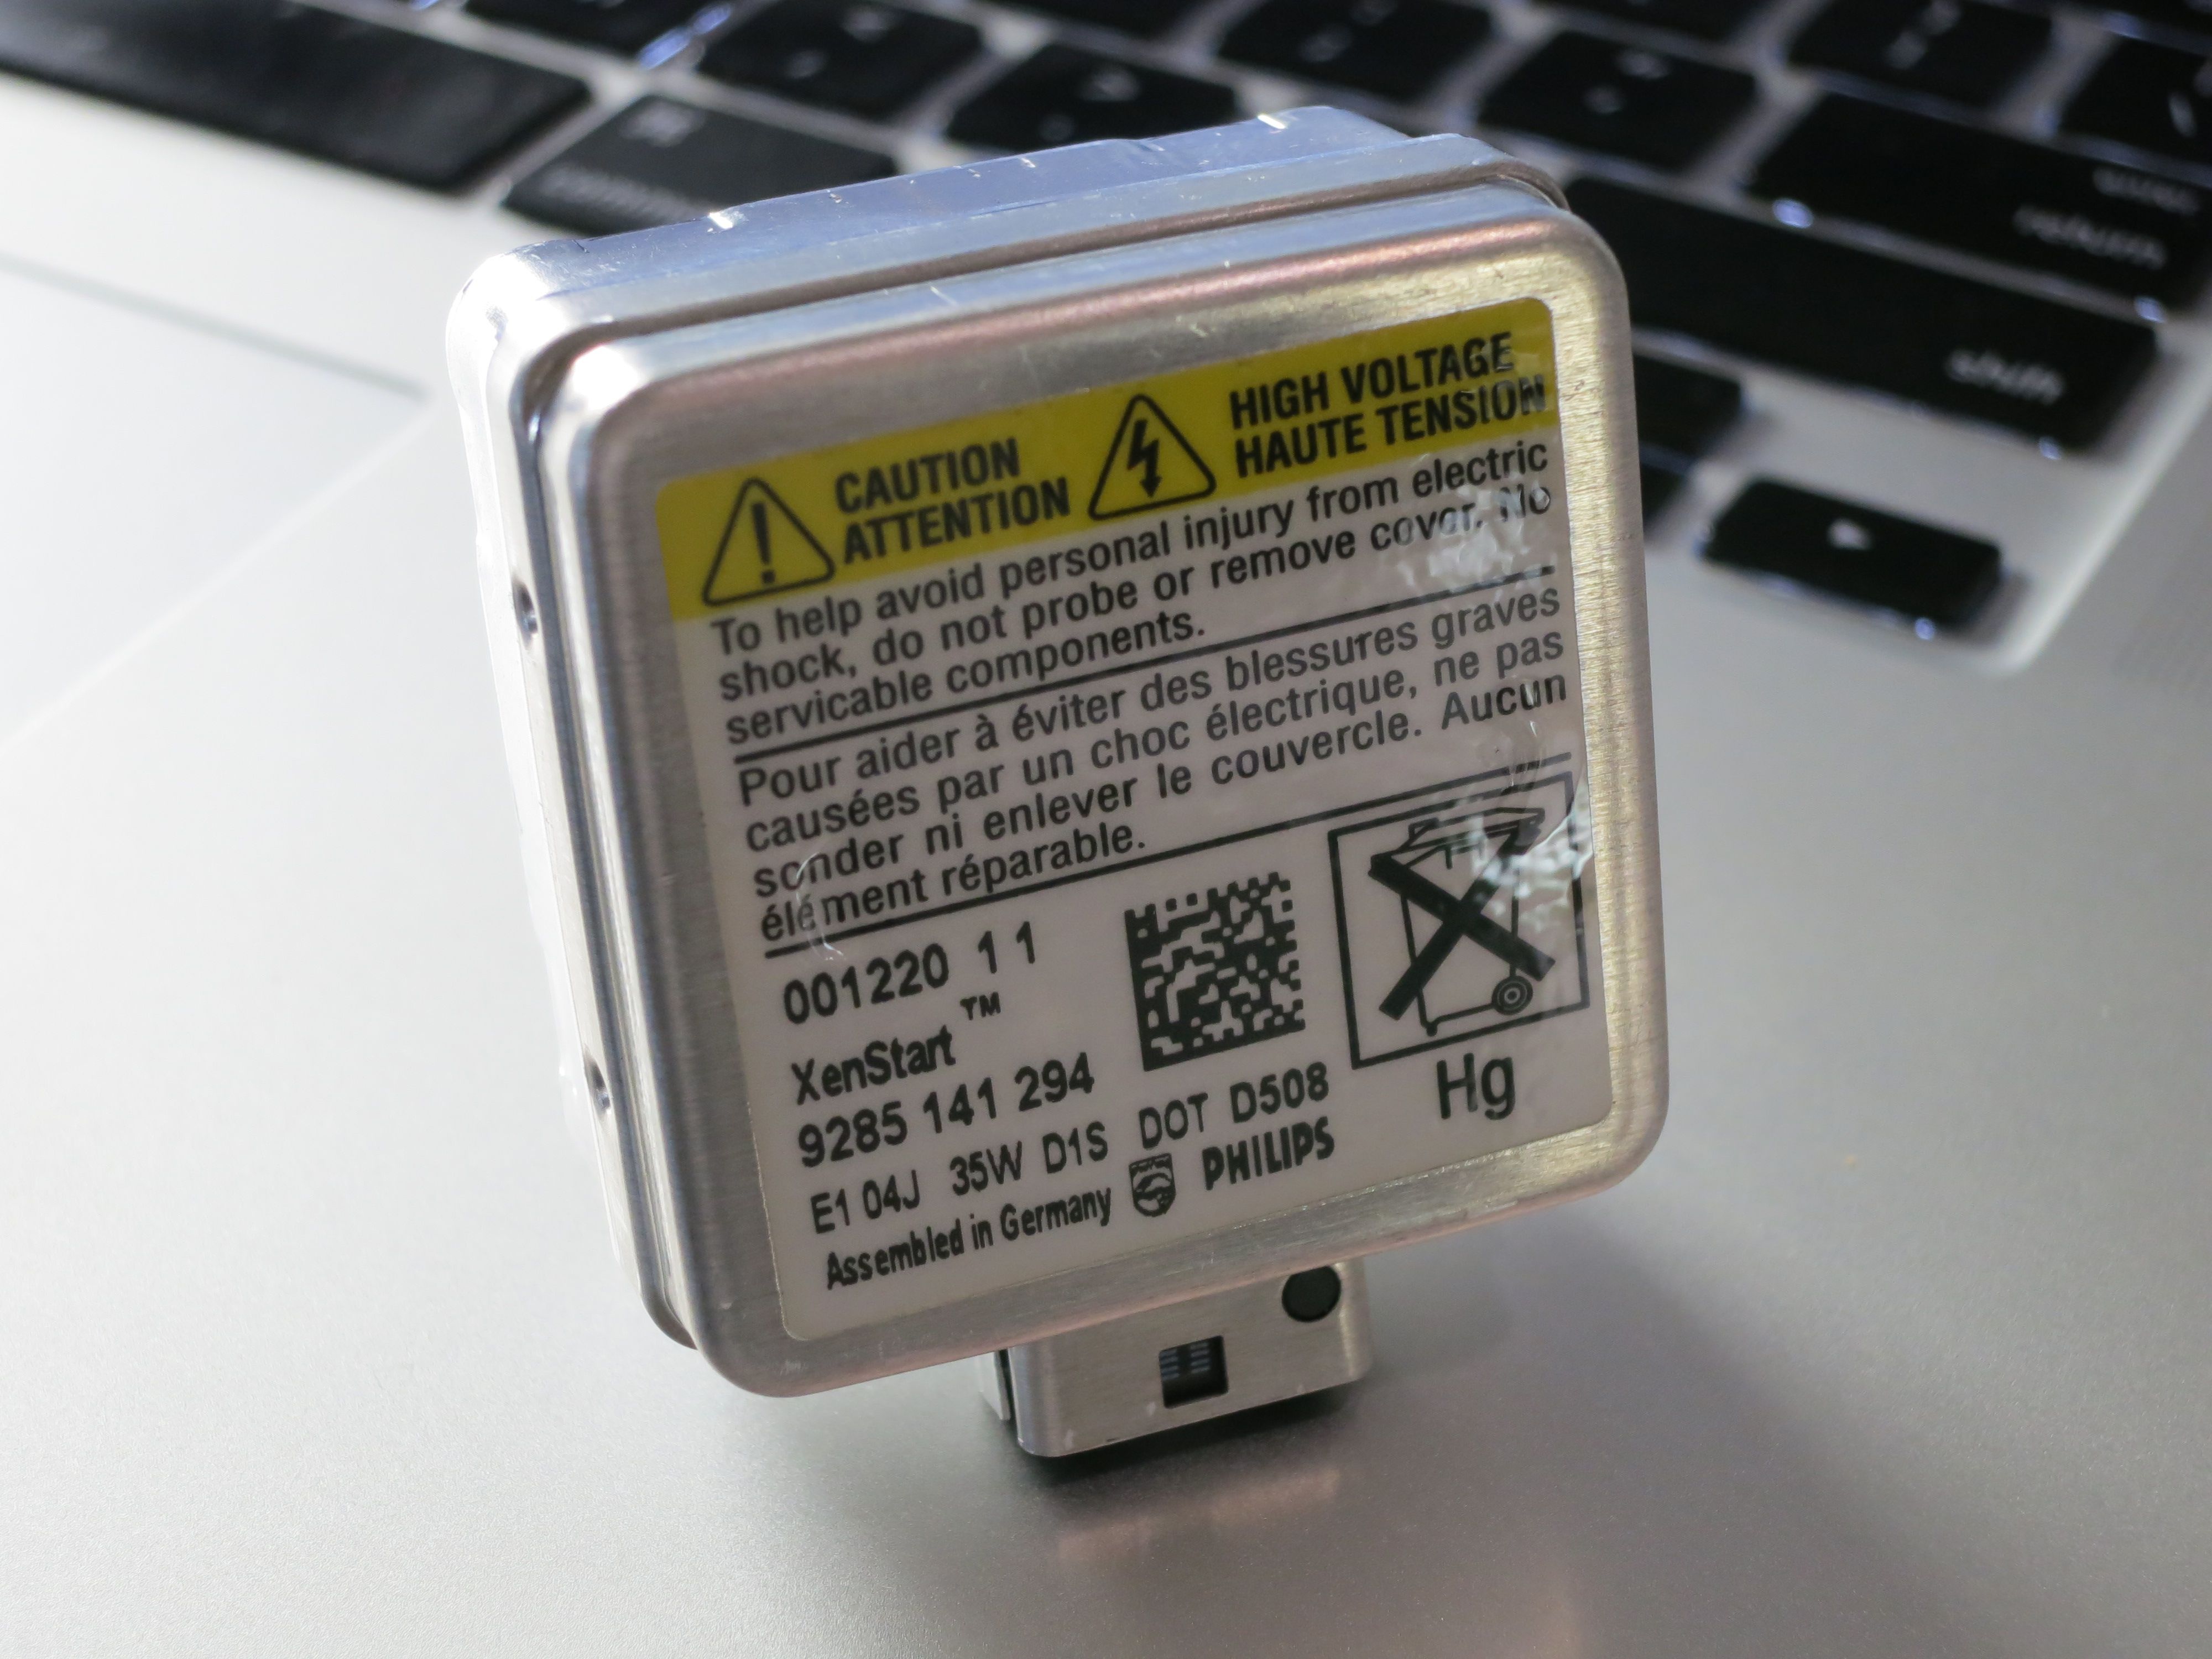
Turns out the bulbs that were in the car were Phillips, here are a couple of pictures of them:
And here is the OSRAM box (bulb basically looked the same):
Seemed like a few people had success changing the bulbs without removing the bumper cover, so I tried that first, on the passenger side, taking out the airbox to access the back of the headlight. That wasn’t too hard, but what was hard was getting the wire to the bulb loosened up from some posts it was snugged between. Upside down, dark, etc., I was worried I was going to break something, and I think a new headlight assembly is $700+. So I gave up on that approach.
I had the bumper off recently to replace a grill that some jerk cracked while my car was parallel parked, and it was not too bad. Now I have had it off three times and am an “expert.” Three times being for the grill, the headlights, and to attach it properly after the headlights. There are several good how-tos out there with pictures, and I did not take any pictures, but here is the quick and dirty with some of my own tips included.
Bumper cover removal:
- Remove three fasteners connecting the bottom of the bumper to the cover that is under the engine. A stubby screwdriver (flat blade) handy for this, or a socket with a screwdriver blade, the fasteners are not a full screwdriver-length above the ground.
- Crank the front wheels to one side, then remove two torx screws fastening the outer/lower edge of the wheel liner to the wheel arch. Peel the wheel liner back, pulling it out of the metal wheel arch channel (don’t worry, pops back in easily).
- Get a light and shine it in there, find two 10mm nuts that are fastened to bolts from the bumper cover, they are a little hard to get at, one a couple of inches above the other, pretty much on the outside edge of the car. To take these off I used a deep 1/4 inch 10mm socket with a long extension and a short extension, with a swivel between the extensions. You could probably also use one or two of those springy extensions. Once loosened most of the way I could get my hands in there to grab them, spin them off the rest of the way, and pull them out.
- Repeat 2 and 3 for the other side of the car.
- Take the three T30 bolts out of the sop of the bumper cover (one in the center of the grill, other two in the bumper cover right near the grill).
- If this is the first time the bumper is coming off you might need to loosen the top of the two bumper “mounts”. There is a hole in the bumper cover to access these, they are a ways down, but a 6 inch T30 bit can reach them. CCW to loosen, one turn probably plenty, more also OK, the bolts are long. More on these mounts in a bit.
- Give a yank on the bumper cover at the back edge at each of the wheel wells. It will pop out from some plastic clips.
- Pull the bumper off from the front and set it on the ground close to the car. Put a towel down first, maybe. Or a towel over something a few inches high (I use a dog ramp). There are some connections from the car to the bumper, I never bothered disconnecting any of them, and they all are on the right side of the bumper facing the front of the car, so keep that side close to the car.
OK, now the headlights:
- Take out the top center bolt holding the headlight on/in, and loosen the bolts on the left and right (all of these are T30). The inboard screw is easy to see, a bit recessed in stuff, but very visible and around the middle of the inboard side of the headlight. The outboard bolt may be difficult. It is accessed through a hole in the sheet metal just inboard of the fender, actually two holes, one above the other. One one side I had no problem doing this with a 6 inch T30 bit. On the other side I thought I was never going to get it out. The socket portion of the bit was/is in the holes in the sheet metal, and on one side I think they did not line up perfectly with the bolt. Wiggling and pressing I finally got it. Later I bent the sheet metal a bit to try and give more wiggle room, but I don’t think that helped much. Later I also tried a 1/4 T30 bit on a long 1/4 extension, and that didn’t work. I am going to order a 8 inch T30 bit and I think that might be better.
- With the center bolt out and the other two loosened you can slide the headlight out. You can disconnect the wiring plug before you pull the headlight out, or after. There is also a clip holding some wire to the headlight you need to pry off. And the plug on the headlight unlatches if you use a screwdriver to pull back on the latching mechanism. Also, since you are unplugging the headlight, don’t bother disconnecting the battery (I have never had to put in radio code, but you do have to set the clock).
- Once the headlight is out take off the cover (two T25s, I think) and you have access to the HID bulb. Wiggle the wire to the bulb out of the prongs on the side of the bulb to give you some slack. I was not able to get the plug out with the bulb in the projector/headlight, the plug is fairly deep and the fit was pretty tight. I don’t think there is a latch anywhere. But with slack in the wire bundle (braided metal cover) you can get the bulb out, disconnect from the plug, connect the new bulb, and then put it in (no latch, but you can tell when it is seated properly). The metal clips holding the bulb in are obvious, spring loaded things.
- Put the headlights back in, and put in the center bolt, but don’t tighten any of the headlight bolts down (if you do it may be hard to get the bumper cover back on) until after you put the bumper cover back on.
Bumper cover installation:
Basically reverse the steps for removal, but pay attention to getting the cutouts in the slot of the two bumper support posts on top of the inner bumper (the big metal bumper that is there to save your hide if you wreck). The top torx bolt can be opened up to create a larger opening for the slot. The posts adjust up and down by screwing, CW to raise, so basically a reverse thread). You can’t get at these things to adjust them unless you remove the bumper or you remove the headlights. One site I looked at suggested the latter, and then supergluing the post adjustment screw so it does not move. I just futzed around taking it on and off. I also adjusted the two bolt mounts on top of the fender to close the hood/bumper gap a bit. First time I took off and replaced the bumper I am sure I missed getting the bumper cover tabs in the post slots, and I am pretty sure whoever had the bumper off before me (guys who installed the K40, and/or Audi doing serpentine belt) made the same mistake. Second bumper cover reinstall I had tightened the headlight bolts down and had to bank on the bumper to seat it, during which I cracked the plastic on at least one of the support posts (I’ll replace next time I take the bumper cover off, not worth doing before then).
New bulbs seem to be great, and I don’t think I threw their alignment off during this process. The headlights do have one white plastic piece on top that I think may be used to adjust up/down and/or left/right. When you do that I think you are supposed to hook up your VAGCOM cable and cycle the motors to get them in their neutral position. But again, at a glance my headlight alignment looks OK so I have not researched this (and manual pulled down from erWin isn’t much help). But I should check against a wall perhaps, and/or have the Audi shop take a look next time they have the car.
Next project is replacing the valve cover gaskets, which are seeping a little bit. The Audi dealership told me I needed to replace the valve covers as a precautionary measure at $700+ per. I told them to piss off, ordered gaskets, and will take this on myself. There are a couple of good DIYs on this online (ordered a couple of tools to help get at tough to get at bolts), but maybe I will document this one with some pictures.
Heart Rate Monitors
With a long standing interests in fitness and technology I have been around the block with a lot of the different heart rate monitors that have been and are available. Focus here will be on watches that just do heart rate and the ability to get data off the watch. I’ll leave devices that can also do GPS and various bike sensors for another day.
Used to be mainly a Polar guy, but the models after my old Polar S810 have just been hideous, and for a plain old heart rate monitor I like to be able to also use it as a daily-wear watch. I mean look at this thing. Gross!

So after my Polar S810 I think I had a few different Timex models (Ironman Speed & Distance, plain old Ironman, etc.) and at least one Nike (triax elite). Both those brands used a USB dongle to get data to a computer, which is a bit slicker than Polar’s old infrared thing. Polar software was probably better, though none of this stuff was Mac friendly. Timex models were disposable since the bands are not replaceable, for me they last a couple of years. The Nike actually had a replaceable band, which is a nice feature for a somewhat expensive watch.
Next I tried a Suunto t6d. Reasonable size, and seems like they make nice watches (and dive computers, where they really got their start), but pricey, at over $300. But just try getting data off the thing. First I used a clip with their discontinued Suunto Training Manager, and that worked OK. Then I updated a computer or two and I was stuck with their Movescount website and file transfer utility. Former only works sometimes, and latter only lets you export in xls format, which can be uploaded to TrainingPeaks, yay, but not to WKO+, boo. The Suunto chest strap is also lousy, the elastic scrunches up and there are electrical connections where you fasten the strap, which is a bad idea for something that gets soaked with sweat. I get all kinds of spurious heart rate readings with the Suunto. It does have a replaceable band, though (good thing for a $300+ watch).
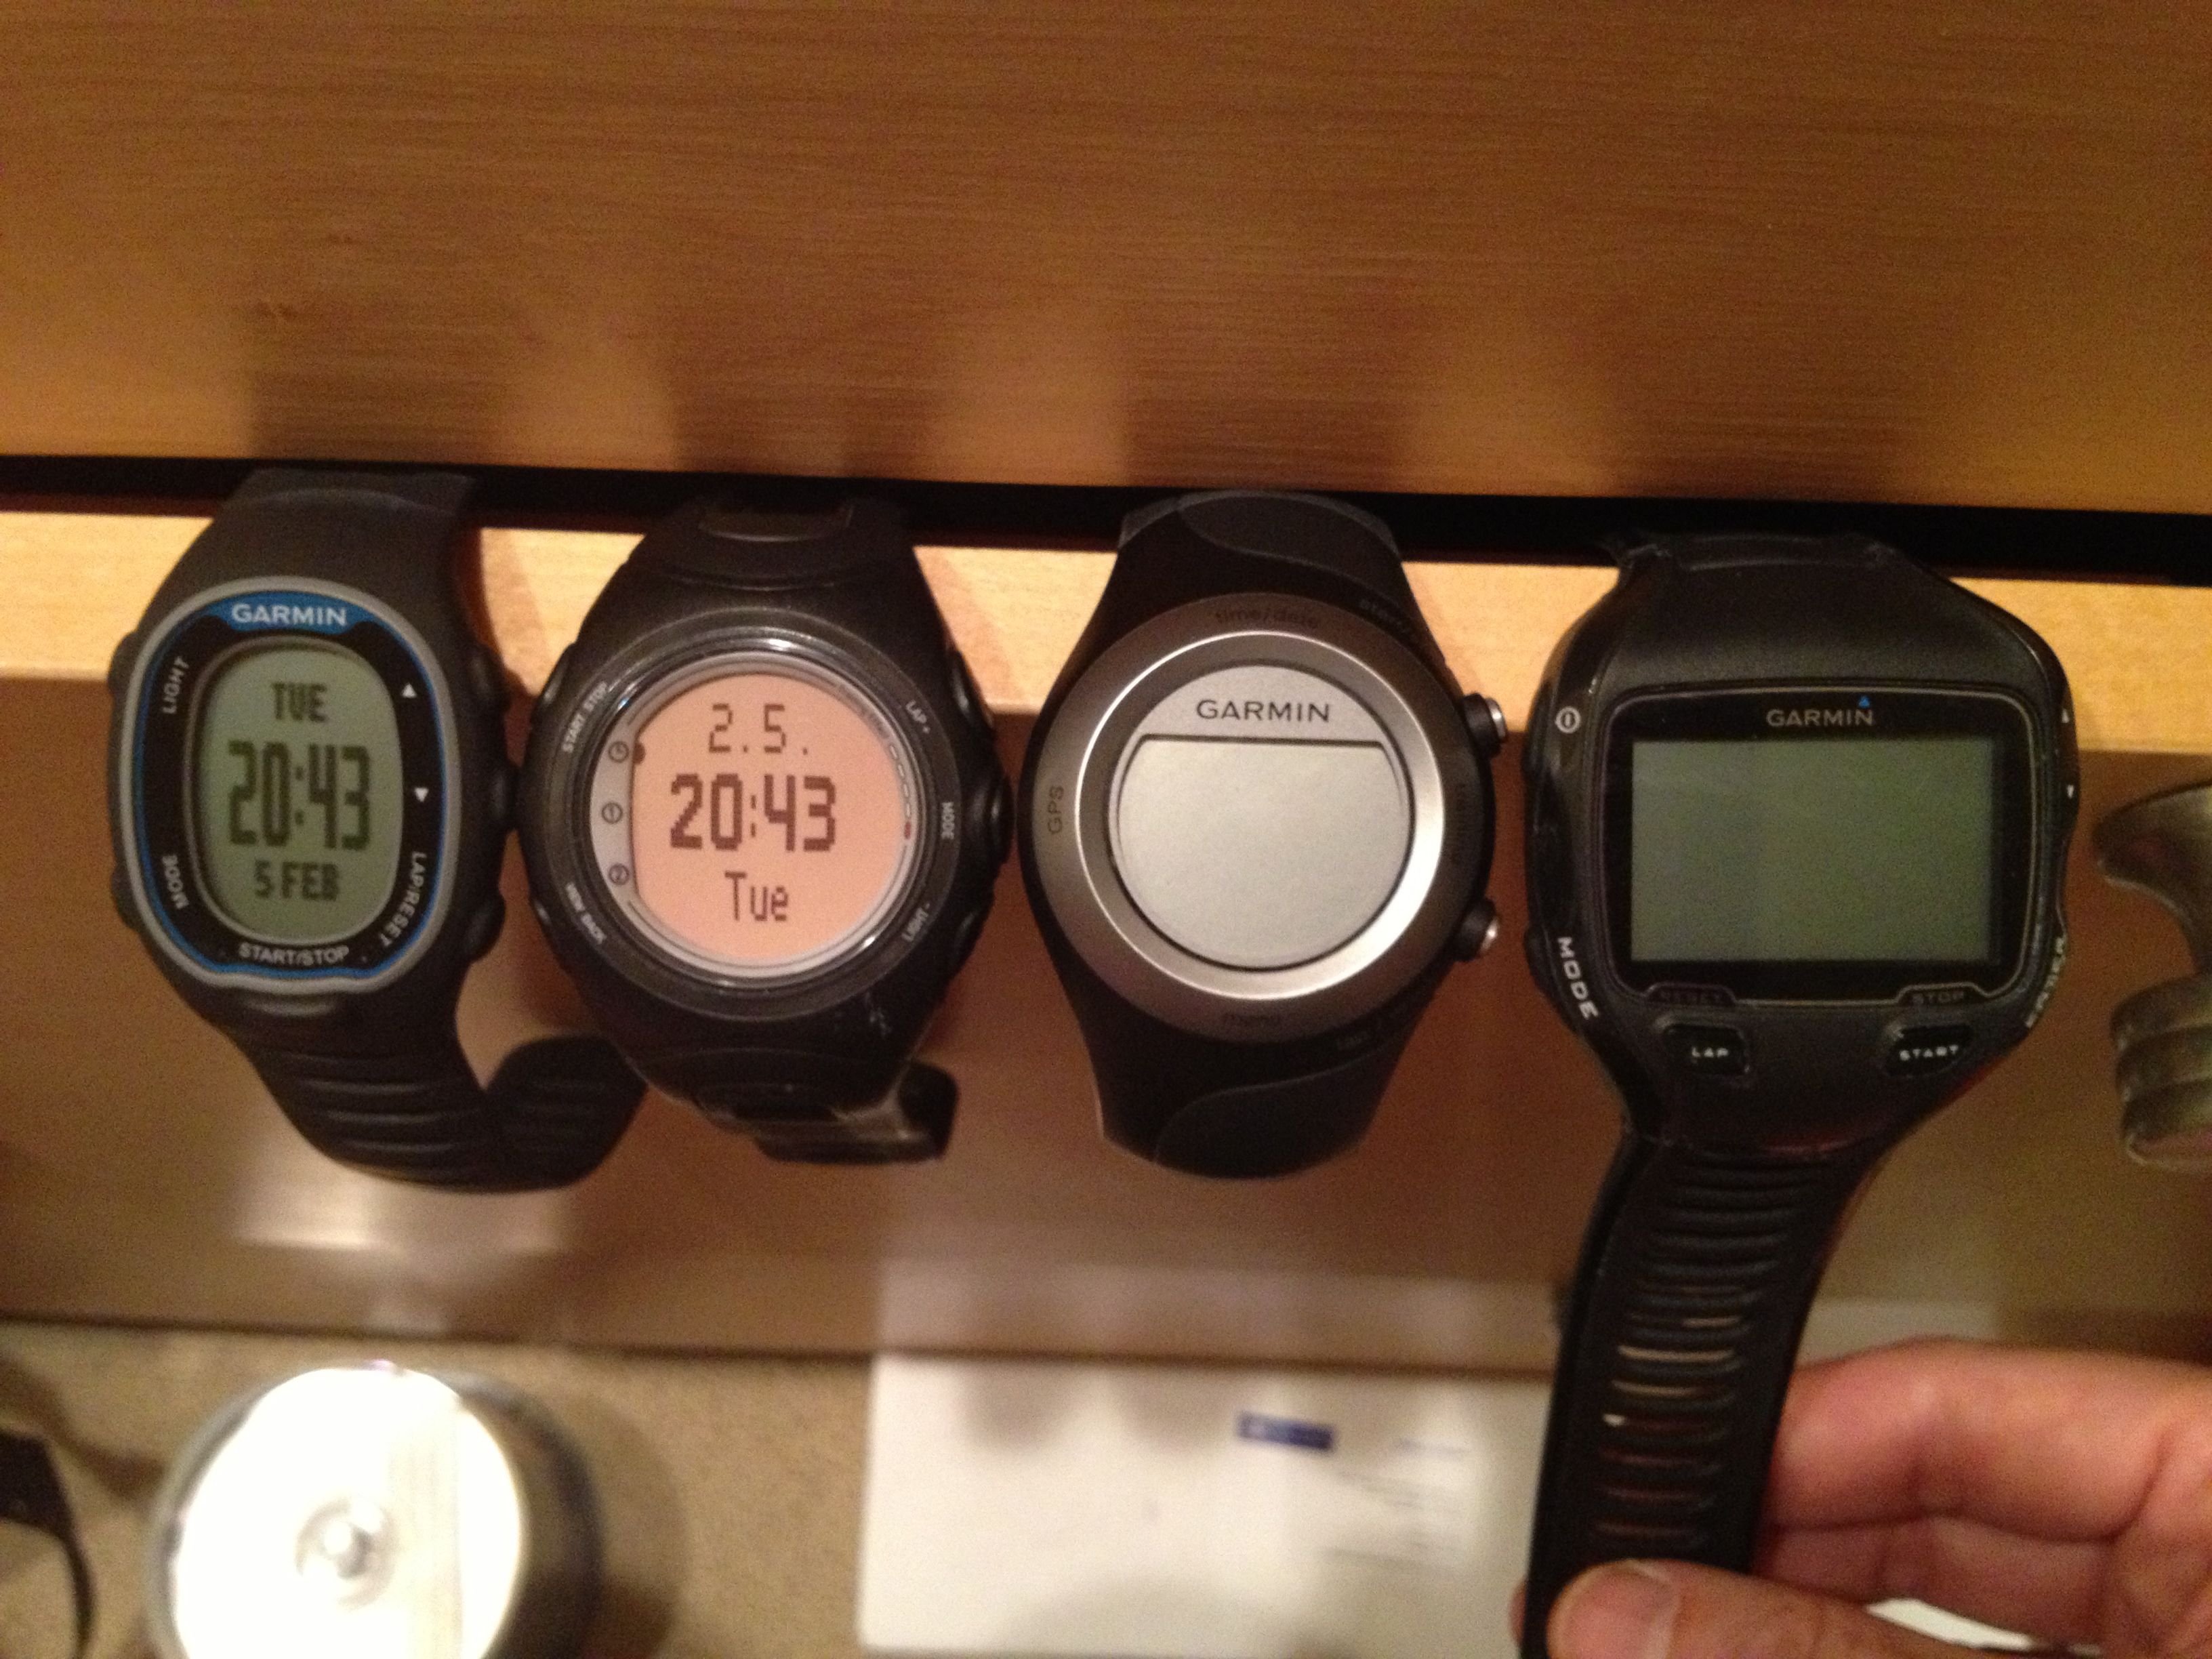
So I have liked a number of the Garmin devices for GPS and other (I think I have had almost every Forerunner and Edge model), and their software seems to be getting better (they even put out Mac versions), and they now make a daily-wearable heart rate only monitor/watch. So the Garmin FR70 became my current experiment.
I have had it a few days, and I like it.
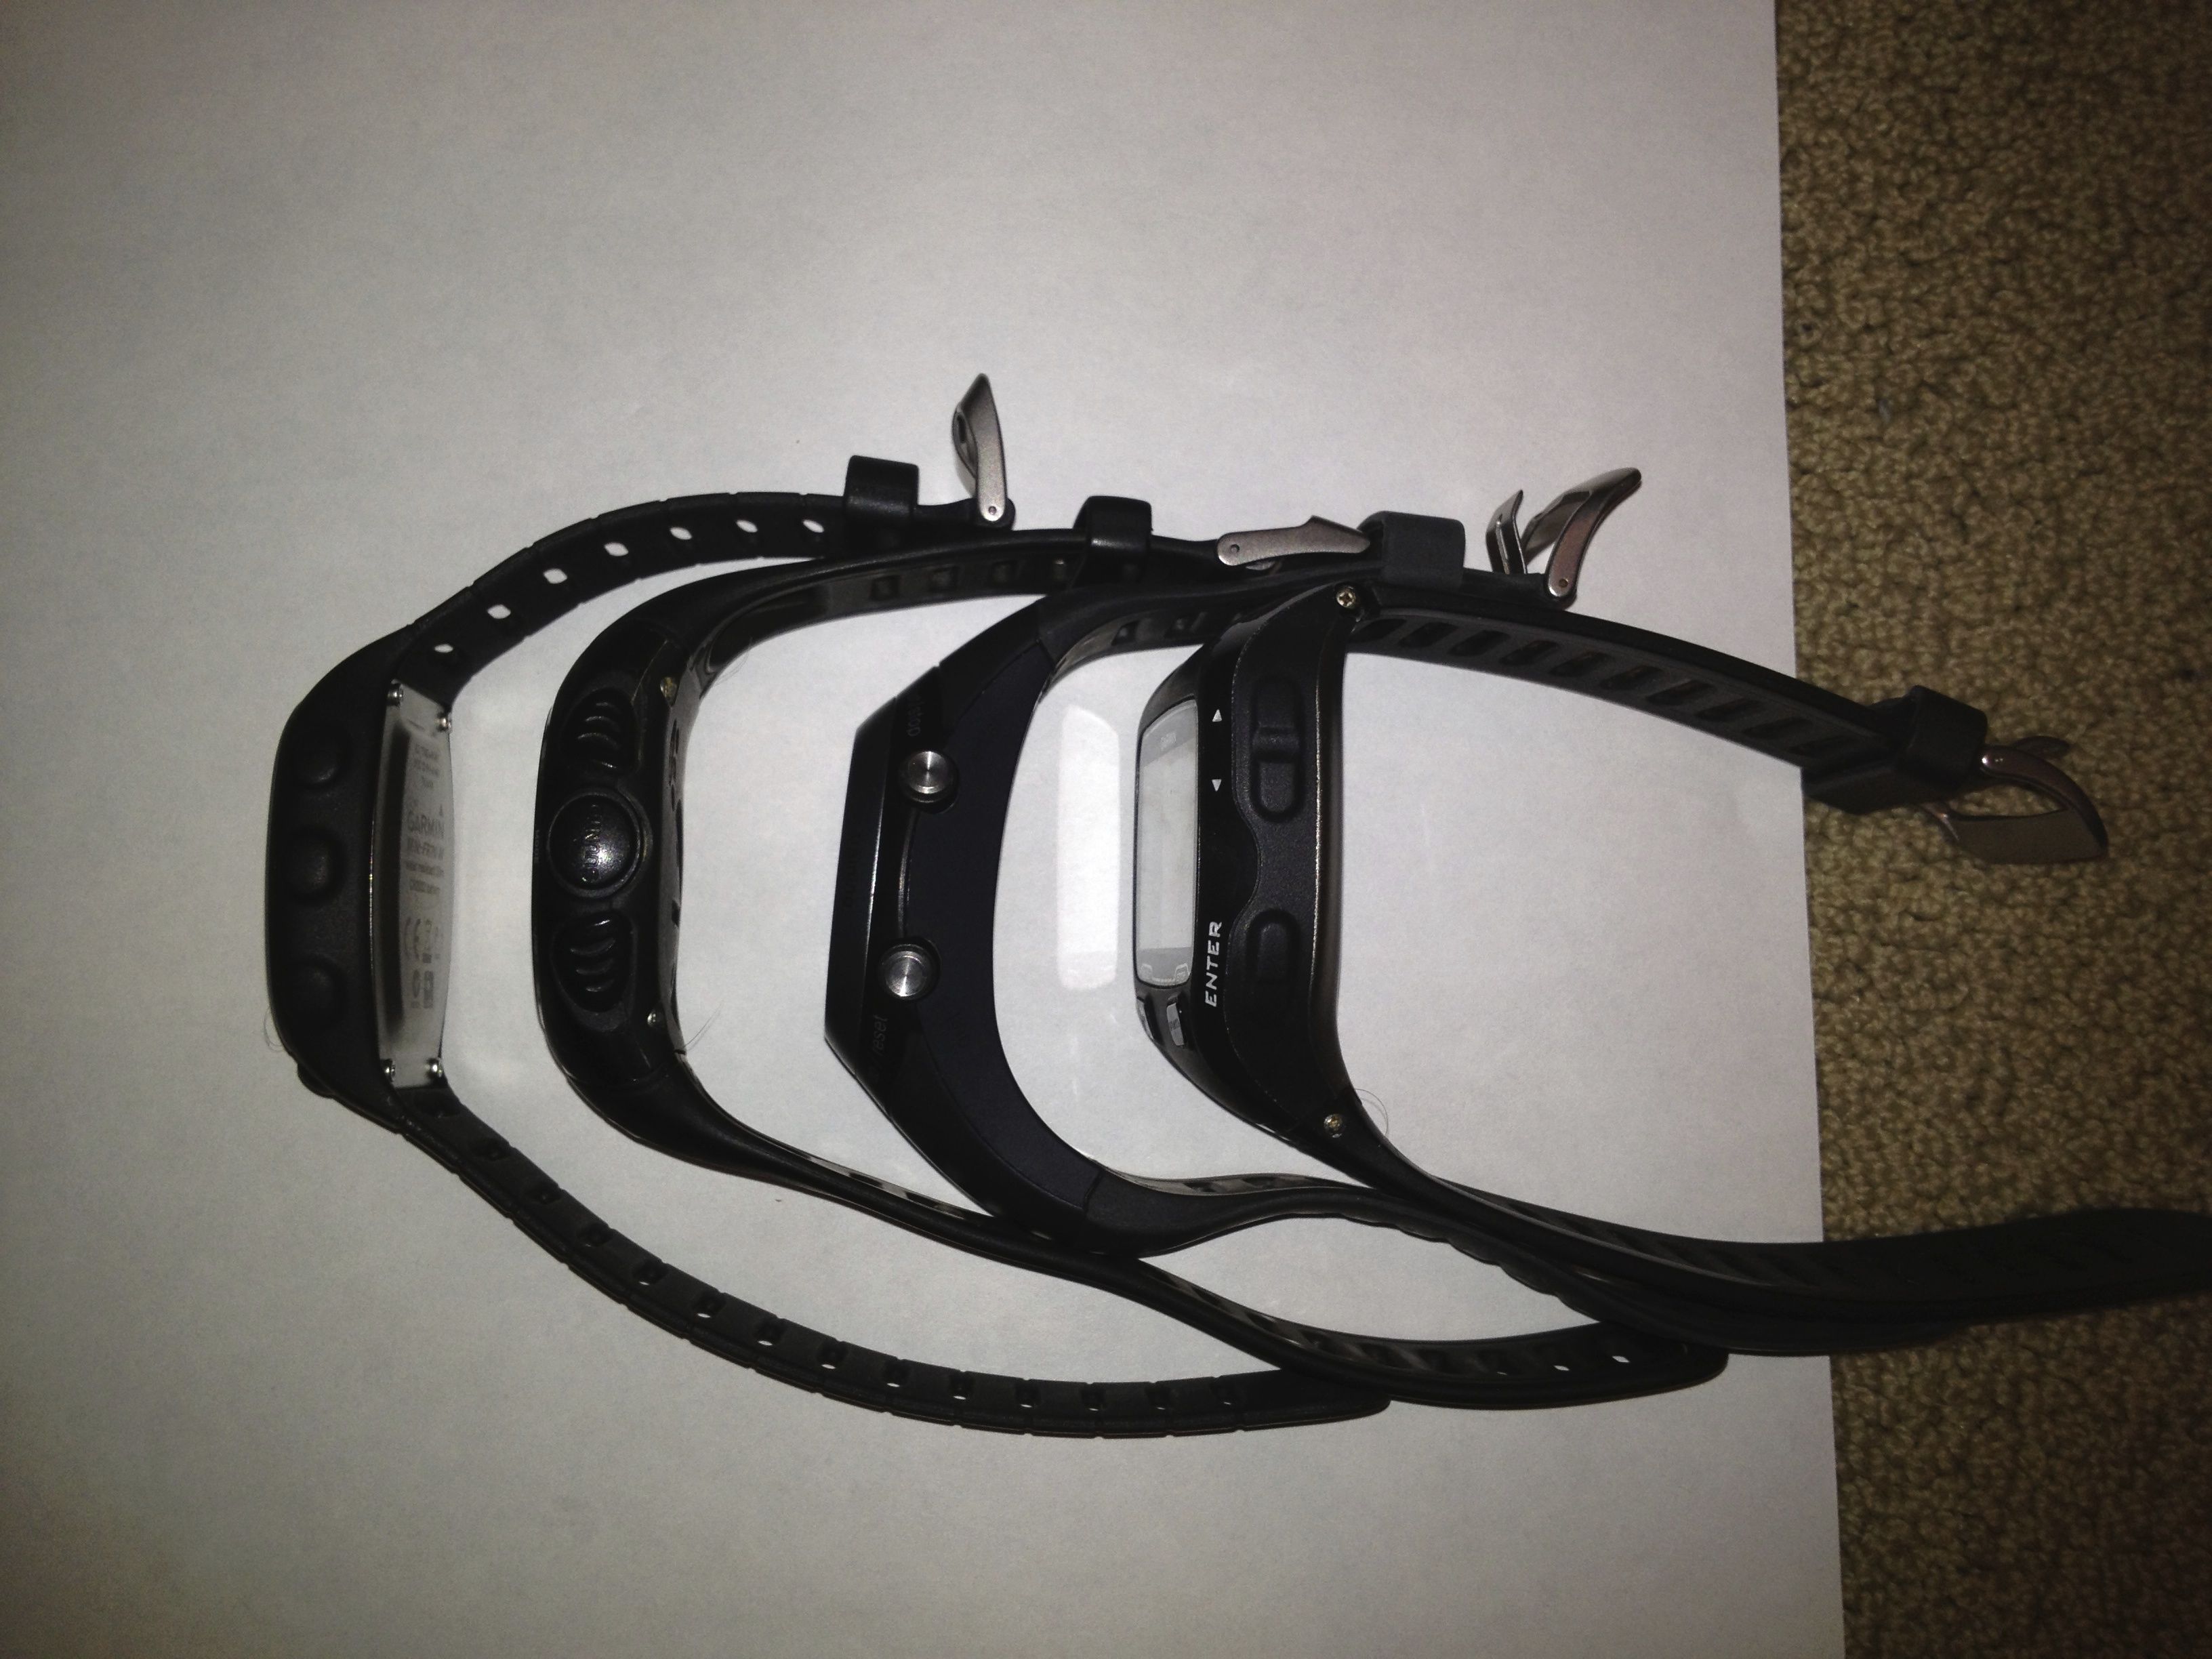
It is a good size, not too big. Here are pictures (left to right) of it with a Suunto t6d, a Garmin Forerunner 410, and a Garmin Forerunner 910XT. Smallest of the bunch.
Data recording is glitchless, I like the standard and especially their fancier chest strap, which handle sweat well and don’t shrivel up (Suunto, take a look and try to learn). Transferring data to a computer works well, and there is even a TrainingPeaks Device Agent you can use to upload to your TrainingPeaks account.
Nice job Garmin.
Reinventing Education
Seems to me that a couple of (related) factors are likely to create some major changes to post-secondary, and maybe also secondary, eduction. Those factors being cost and technology.
On cost, between 1986 and 2011 the cost of college tuition increased by 498%, more than 4x the 115% increase in CPI over the same time period (http://bit.ly/RaYciE). Likely this can be largely attributed to some combination of too much easy money and poor management. Bugs me enough that I am unlikely to give more than token gifts to my ivy league alma mater. I do not think they should be rewarded for creating a bubble, never mind increasing the size of the bubble, a bad thing that will eventually burst.
On technology, online learning is now ready for prime time. Video, testing, project, and collaboration tools are excellent. Given the choice between learning in person from the 278th best teacher in a field or in an online setting from the best teacher in the same field I might choose the online setting before even considering cost, which is another compelling factor. I get the arguments for needing “live” teaching and classes, but I think the arguments get weaker as you move down the educational institution food chain.
I have been poking around in and taking advantage of some of the online offerings, and they are pretty neat:
Coursera is maybe my favorite of the offerings, platform seems solid, and there is a good mix of subject matters, from technical to liberal arts and other.
Udacity is also a very slick platform, but the subject offerings are more limited and mainly of a technical nature.
edX has limited offerings right now, but a good mix of topics, and is backed by MIT and Harvard and a few other forward thinking powerhouses, I’ll keep an eye on this one.
iTunes U has the largest and broadest set of offerings, but does not have any of the slick interactive and collaborative features of the other sites.
Gibberish Printer Output (ASCII Text) with Mac OS
Setting up a new small office and landlord said we could have/use an old Ricoh Aficio MP2000 multifunction printer that was in the space. Figured it probably had something wrong with it that would make it unusable, but gave it a try. Figured out that Ricohs (at least this model) have a default user administration username of “supervisor” with null (not the word null, a blank) for the password, and was able to set up an admin user to log in and get to the settings via a web browser.
But when I printed a test page from my MacBook Pro I got many many pages of ASCII gibberish. I think I have seen this problem before, but not sure I remember ever sorting it out. I tried looking at settings in CUPS (Common Unix Operating System, first enable in Terminal, with “cupsctl Webinterface=yes”, then go to 127.0.0.1:631), but no joy there.
Turns out the Ricoh printer drivers are Postscript printer drivers, and apparently many fancier printers only have Postscript as an expensive option, which this particular printer did not have. But after poking around a bit I found that The Linux Foundation has PCL drivers for many of these “high end” printers, the PPDs are in a package called pxlmono, and a couple of other packages need to be installed for the pxlmono drivers to work (Foomatic-RIP and Ghostscript, details at http://bit.ly/XhbhJE). I uninstalled the Ricoh Postscript drivers, installed the pxlomo drivers, and off to the races!
Burning Blue-ray Discs on Mac Pro
Some time ago I installed a Blue-ray burner in my Mac Pro (early 2008 model, MacPro3,1), did the homework at the time and selected and installed a LG WH12LS38 in the bay below the factory installed drive (a Pioneer DVR-112D hooked up to to the ATA bus). I found some instructions online and the install is pretty simple. You need to pull some fans out to get at things, and the drive hooks up to one of the two spare SATA ports on the motherboard. Take the faceplate off the drive, put it in the bay, hook up power and SATA cables, and the drive shows right up.
I had no problem burning CDs and DVDs with the new drive, but recently I tried to burn some files to a BD-R and I do not appear to be able to do this from the Mac OS (running the latest version of Mountain Lion now, 10.8.2), I get a message along the lines of not enough room on the disc, even though there is plenty of room. I was about to give up, but then figured I might see if I could burn a BD disc from Windows 7 running in Parallels. My Parallels setup defaults to the upper/factory optical drive, but it was simple to point it at the BD drive by changing the CD/DVD 1 setting in the device configuration window. Drag the files to the disc, right mouse click on the drive icon to select burn, and off to the races! I am using Phillips 6x BD-R discs and I set the burn speed to the lowest setting, 2x (based on my experience burning DVD DLs I get no coasters when I use low burn speeds). And once the disc has been burned I can also access/use the files from the Mac OS (after quitting Parallels, which when running ties up the BD drive).
PS – Might be that Toast would work from Mac OS, but Toast is expensive and I don’t really like it, the install puts files all over the place.